

What You Need to Know Before a Large Hopper Window Install
Planning a large hopper windows install is one of the most effective ways to bring natural light and fresh air into a basement space. But larger units come with extra challenges — heavier frames, stricter shimming requirements, and a tighter margin for error — that a standard window swap simply doesn’t have.
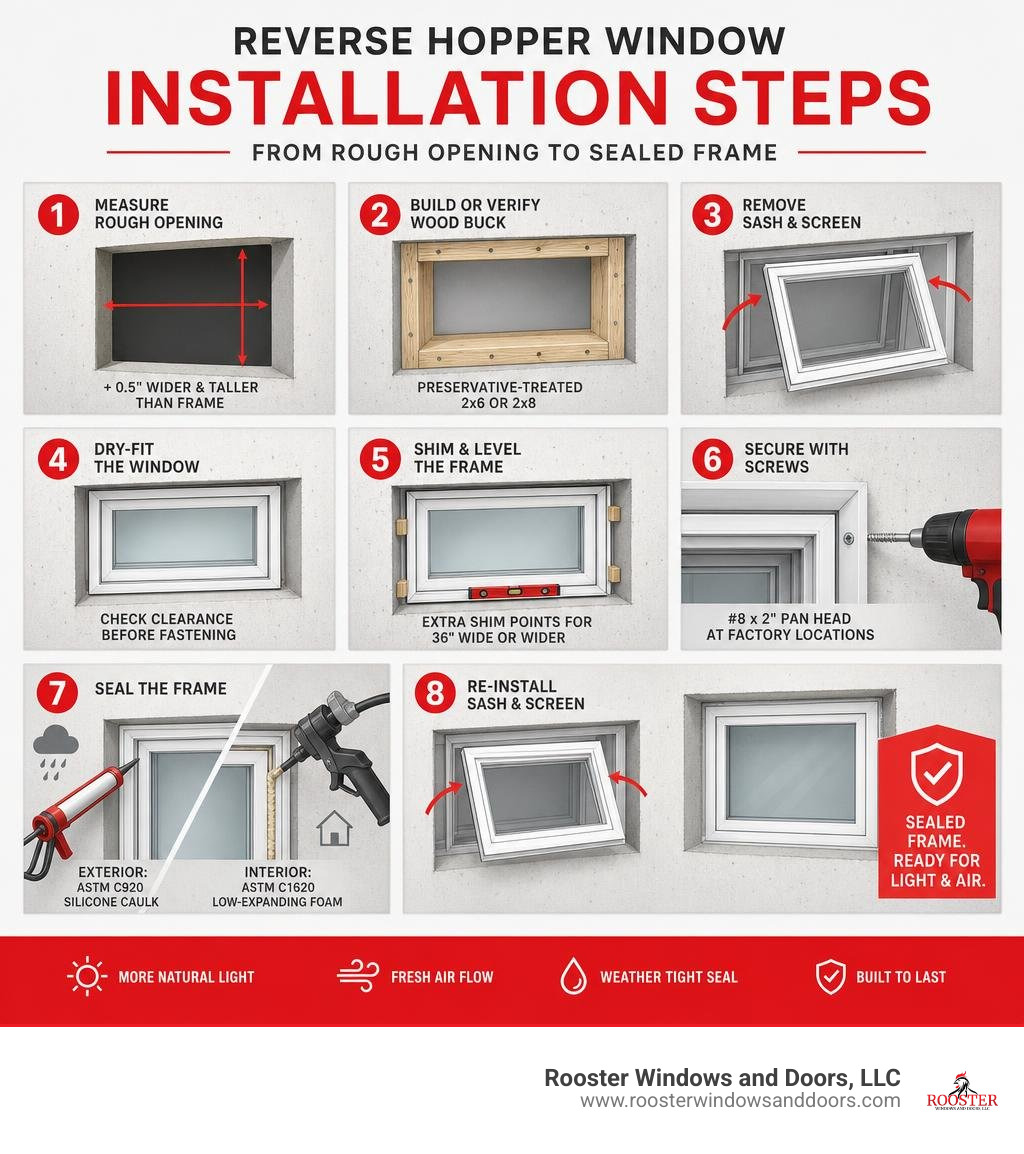
Here’s a quick overview of what the process involves:
- Measure the rough opening — it should be 0.5″ wider and taller than the window frame
- Build or verify a wood buck — preservative-treated 2×6 or 2×8 framing is standard for concrete openings
- Remove the sash and screen before inserting the frame
- Dry-fit the window to check clearance before any fasteners go in
- Shim and level the frame — for windows 36″ wide or wider, add extra shim points to prevent sill deflection
- Secure with #8 x 2″ pan head screws at factory-prepped locations
- Seal with ASTM C920-rated silicone caulk on the exterior and low-expanding ASTM C1620 foam on the interior
- Re-install the sash and screen once the frame is confirmed plumb, level, and square
I’m Piotr Wilk, and at Rooster Windows and Doors, LLC, our team has spent over two decades handling large hopper windows install projects across Lake, Cook, and McHenry County. That hands-on experience in the Chicagoland area — with its demanding freeze-thaw cycles and variety of foundation types — shapes every recommendation in this guide.
Must-know large hopper windows install terms:
Standard vs. Large Hopper Window Requirements
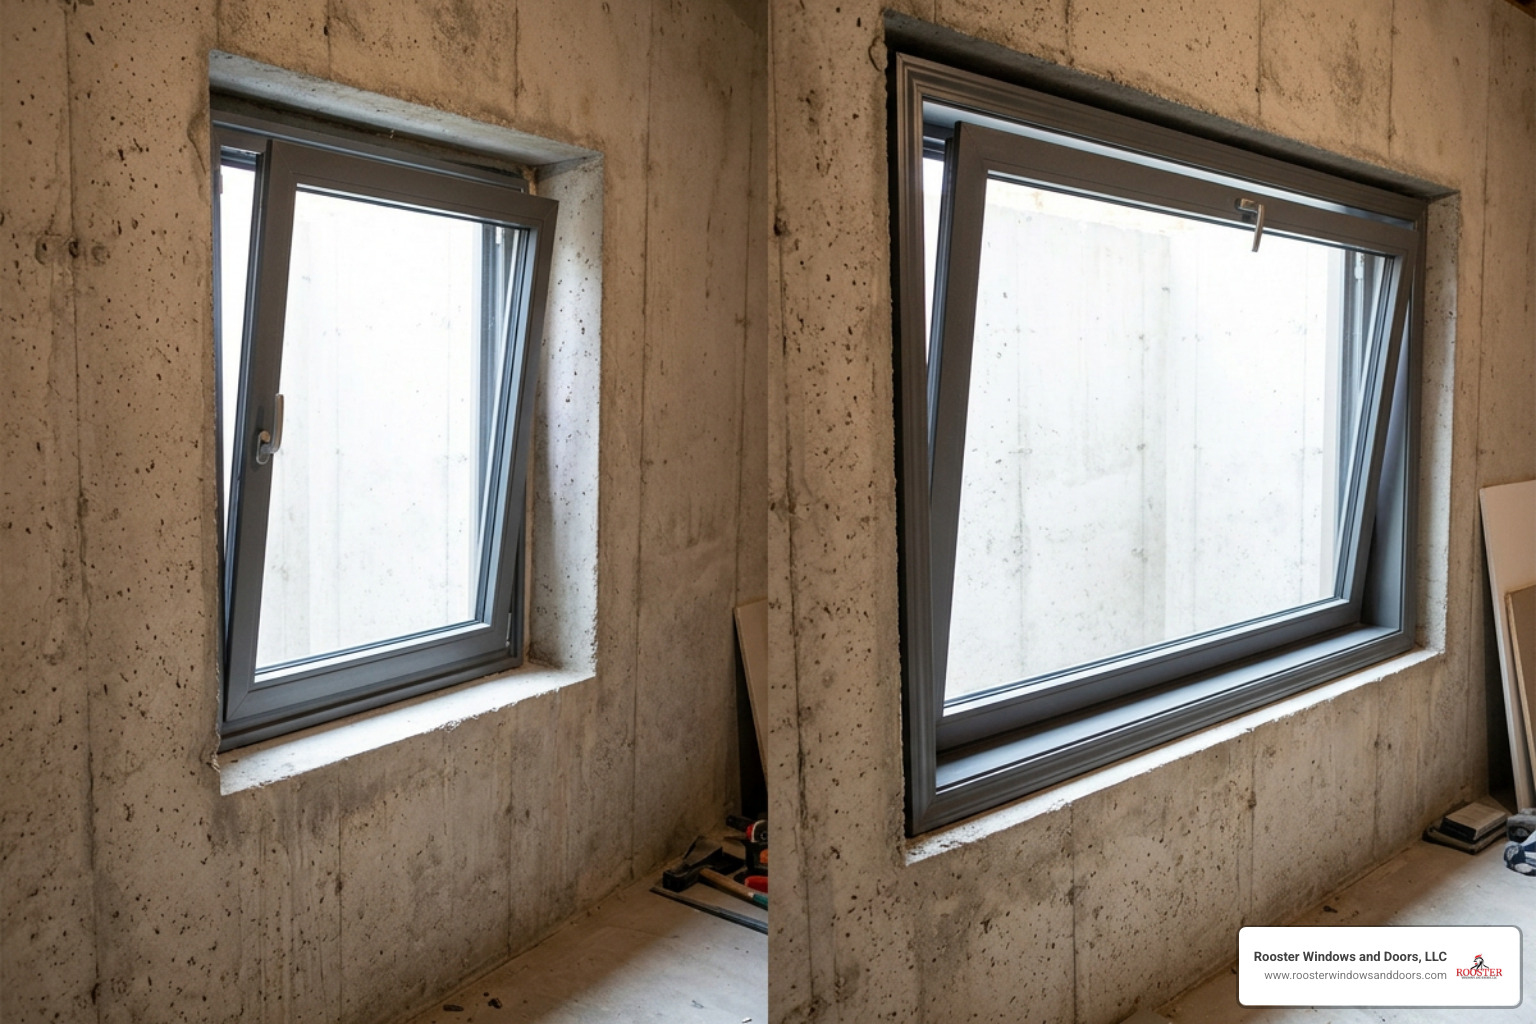
While a standard-sized basement window is relatively forgiving, a larger hopper window demands strict adherence to structural physics. When we transition from a standard 24-inch unit to a wide-span hopper, several mechanical dynamics change.
First, the physical weight of the insulated glass unit (IGU) and the vinyl or wood frame increases exponentially. This weight places continuous downward pressure on the sill and outward tension on the side jambs when the heavy sash swings inward from the top.
To prevent frame deflection and bowing, a large hopper windows install requires heavy-duty structural support. If a window unit is 36 inches wide or greater, the sill is highly vulnerable to sagging in the center under the weight of the sash. To combat this, we must add an additional shimming location directly under the center of the sill to prevent deflection.
Without this critical support point, the frame will sag, causing the sash to bind, rub, or fail to lock securely. To understand the fundamental mechanics of these inward-swinging systems before diving into heavy installations, review our Beginners Guide to Hopper Windows.
Sizing and Rough Opening Specifications
Achieving a flawless fit starts with precise rough opening calculations. For any standard vinyl or wood hopper window, the rough opening should be exactly 0.5 inches wider and taller than the outside frame dimensions of the window. For example, a large 36″w x 24″h window fits best in a 36.5″w x 24.5″h rough opening. This provides a consistent 1/4-inch expansion gap around the entire perimeter, allowing space for proper leveling, shimming, and thermal expansion.
When dealing with masonry or concrete walls common in Chicagoland basements, you will often need to construct a wood buck using preservative-treated wood (typically 2×6 or 2×8 dimensional lumber) to line the concrete opening.
Before placing your order, you must check the opening for squareness. Measure the opening diagonally from the upper-left corner to the lower-right corner, and from the upper-right to the lower-left. These two diagonal measurements must be within 1/8 inch of each other. If the opening is out of square by more than 1/8 inch, the rough opening must be adjusted or rebuilt before installation can proceed.
To explore common sizes and find the perfect dimensions for your basement project, check out The Big List of Every Basement Hopper Window Size You Need.
Essential Tools and Materials for Heavy Units
Installing a heavy, high-performance hopper window requires contractor-grade tools and materials. Standard household caulk and random wood scraps will not preserve your warranty or protect your home from our harsh Illinois winters.
| Tool / Material | Standard Hopper Window | Large Hopper Window (36″+ Wide) | Purpose |
|---|---|---|---|
| Fasteners | Standard wood screws | #8 x 2″ Phillips pan head screws | Secure the frame without distorting the vinyl |
| Shims | Standard wood shims | Stacked contrasting wedge shims | Level the frame and prevent rolling |
| Sealant | Standard silicone | ASTM C920, Class 25 sealant | Provide a flexible, weatherproof exterior seal |
| Insulation | Fiberglass or standard foam | ASTM C1620 low-expanding foam | Insulate the perimeter without bowing the frame |
| Support | Corner shims only | Corner, center sill, and 12″ interval shims | Prevent structural deflection and sagging |
Always wear appropriate personal protective equipment (PPE), including safety glasses and heavy-duty work gloves, when handling large glass units. Additionally, if you are working on a home built before 1978, the existing window frame may contain lead-based paint. You must comply with the U.S. EPA’s Lead-Based Paint Renovation, Repair, and Painting Program (RRP Rule) by utilizing lead-safe containment and cleanup practices.
For detailed manufacturer specifications on fastener placement and structural requirements, refer directly to the ProVia Vinyl Hopper Window Installation Instructions.
Step-by-Step Guide to a Large Hopper Windows Install
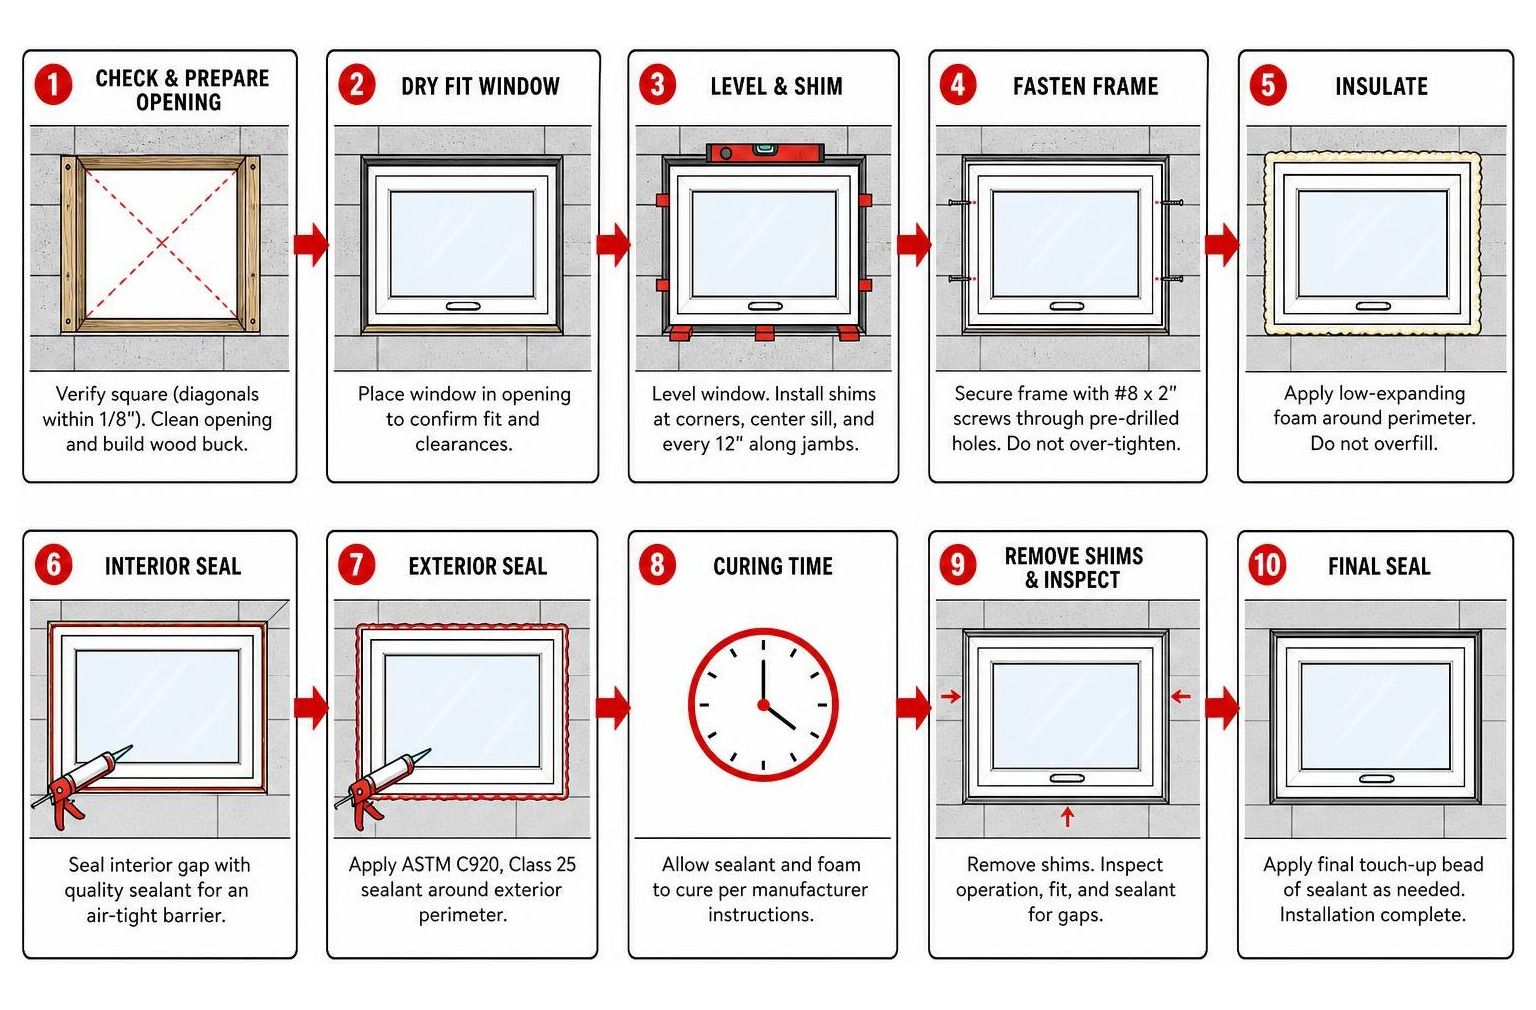
A successful, energy-efficient installation relies on executing every phase of the process in a precise, logical sequence. From the initial dry-fit to the final bead of caulk, taking shortcuts will inevitably lead to drafts, water leaks, or a window that refuses to lock. For a broader overview of the professional standards we bring to every job site, you can read our Window Installation page.
Preparing the Rough Opening for a Large Hopper Windows Install
Before lifting your new window into place, the rough opening must be meticulously prepared:
- Clear and Clean: Remove the old window frame, sash, and any remaining concrete nails, mortar, or old sealant. Use a wire brush and vacuum to remove all dirt, dust, and crumbling masonry debris.
- Inspect the Wood Buck: If you are installing into an existing wood buck, inspect the wood for rot, insect damage, or structural soft spots. Replace any compromised wood with fresh, preservative-treated 2×6 or 2×8 lumber.
- Check Level, Plumb, and Square: Use a 4-foot spirit level to check the sill plate for level and the side jambs for plumb. If the sill is sloped or uneven, you will need to pre-align the bottom opening using thin, flat shims secured to the buck.
- Dry-Fit the Frame: Remove the window sash and screen from the new frame to reduce weight and protect the glass. Carefully lift the empty frame into the opening. Verify that you have a uniform 1/4-inch gap around the entire perimeter. If the frame binds or fits too tightly, adjust the wood buck before proceeding.
For a comprehensive look at preparing basement openings and handling old masonry structures, refer to our Basement Windows Complete Guide.
Shimming and Securing a Large Hopper Windows Install
Proper shimming is the most critical phase of a large hopper windows install. If done incorrectly, the frame will rack, twist, or bow, rendering the window useless.
- Use Stacked Contrasting Shims: Never use a single wedge-shaped shim. A single wedge creates a sloped surface that forces the window frame to roll or twist. Always use two wedge-shaped shims slid over each other from opposite directions (plane-to-plane) to create a flat, parallel support surface.
- Observe Corner Clearance: Do not place shims within 4 inches of the top or bottom corners of the window frame. Shimming too close to the corners pinches the welded vinyl joints, causing severe frame distortion.
- Interval Shimming: Place shims behind every factory-prepped installation hole in the side jambs. If the spacing between side jamb shims is greater than 12 inches, you must add additional intermediate shims to stabilize the frame.
- Secure the Frame: Once the frame is confirmed plumb, level, and square, drill 1/8-inch pilot holes through the prepped jamb holes and into the wood buck. Drive #8 x 2″ Phillips pan head screws through the jambs and shims. Start with the top screws to hang the frame, then secure the bottom and sides, checking sash-to-frame margins continuously. Never drill or drive screws through the bottom sill, as this destroys the integrated water barrier and causes immediate leaks.
For more expert tips on managing custom framing and shimming dynamics, read our Custom Size Windows Ultimate Guide.
Handling Deep-Pocket and Well Applications
In many Chicagoland basements, hopper windows are installed in deep concrete window wells or recessed ceiling pockets where overhead clearance is extremely tight. These deep-pocket applications present unique challenges because there is very little room to maneuver the window frame or access the top hinges.
When working in a restricted ceiling pocket, you must remove the sash before installing the frame. For standard installations, the sash is simply tilted and lifted out. In a deep-pocket application, however, you may need to manually depress the sash arms or remove the black travel stops to release the sash.
Once the frame is secured in the deep pocket, re-installing the sash requires carefully aligning the hinge pins while working within the recess. If the ceiling clearance prevents you from re-installing the black travel stops, you must manually push the sash arms down into their tracks to ensure smooth, secure operation.
To learn more about optimizing below-grade installations in tight spaces, check out our guide on Windows for Basement.
Insulating, Sealing, and Re-installing the Sash
With the frame securely fastened and verified square, it is time to weatherproof the assembly:
- Insulate the Perimeter: Fill the 1/4-inch gap between the window frame and the rough opening with AAMA-approved, low-expanding polyurethane foam (complying with ASTM C1620). Apply the foam in a continuous bead, taking care not to over-pack the cavity. Over-insulating or using high-expansion foam will apply immense pressure to the vinyl jambs, causing them to bow inward and block the sash.
- Clear the Weep Holes: Ensure that the exterior weep holes at the bottom of the vinyl frame are completely free of foam, sealant, or flashing. These holes are vital for draining water away from the glass.
- Apply Exterior Sealant: Apply a continuous, high-quality bead of ASTM C920 Class 25 silicone caulking around the entire exterior joint where the window frame meets the wood buck or masonry. This creates a flexible, airtight, and watertight barrier against wind-driven rain.
- Re-install the Sash and Screen: Carefully lift the heavy glass sash back into the frame. Align the hinge arms and pins according to the manufacturer’s directions. Open and close the sash several times to ensure it swings smoothly, seals tightly against the weatherstripping, and locks without resistance. Finally, snap the screen back into place.
Common Installation Mistakes and Code Compliance
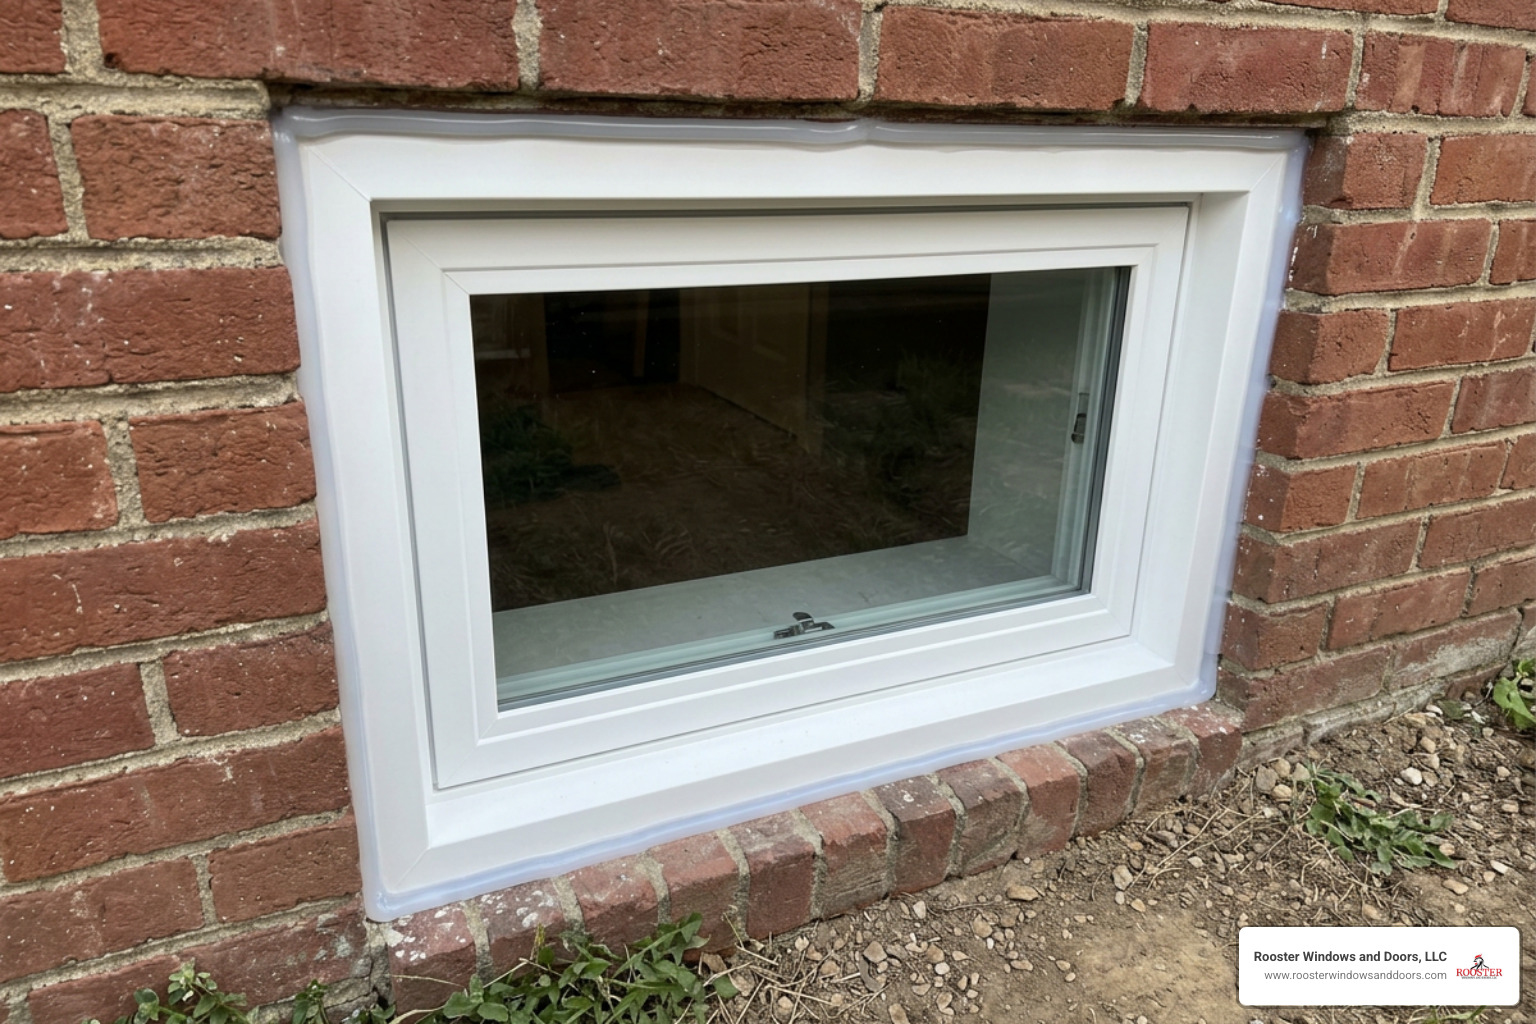
Even experienced DIYers can run into trouble when installing large basement windows. Here are the most common mistakes our crew at Rooster Windows and Doors, LLC repairs in the field, and how you can avoid them:
- Drilling Through the Sill: Some installers try to secure the bottom of the window by driving screws straight through the bottom track. This punctures the water chamber, allowing rain to drain directly into your wood buck and basement wall. Never drill through the sill.
- Over-Insulating: Using standard expanding foam or packing fiberglass too tightly into the expansion gap will bow the side jambs and header. Always use low-expanding foam and let it cure naturally.
- Ignoring Lead Paint Safety: In older homes across areas like Evanston, Highland Park, and Chicago, failing to test for and safely contain lead paint dust during demolition is a serious health hazard. Always follow EPA RRP guidelines.
- Confusing Ventilation with Egress: A common misconception is that a large hopper window can serve as an emergency escape route in a finished basement. Under the International Residential Code (IRC), an emergency egress window must have a minimum net clear opening of 5.7 square feet, a minimum opening height of 24 inches, a minimum opening width of 20 inches, and a maximum sill height of 44 inches from the floor.
While a large hopper window (such as a 36″ x 24″ or 41.5″ x 21.5″ unit) provides incredible light and ventilation, its inward-swinging sash restricts the actual clear opening area (often yielding only 3.8 to 4.1 square feet of clear space). Therefore, standard large hopper windows do not meet egress codes and should only be installed in basement rooms that already have a primary, code-compliant egress exit.
If you are planning a full basement remodel and need to hire professionals to ensure absolute safety and code compliance, explore our network of Basement Window Replacement Contractors.
Frequently Asked Questions about Large Hopper Windows
Do large hopper windows meet emergency egress building codes?
No. Standard large hopper windows do not meet IRC egress requirements for finished basements or sleeping quarters. Because the sash hinges at the bottom and swings inward, the physical glass and frame restrict the actual path of escape.
For example, a 36″ x 24″ hopper window only provides a clear opening area of approximately 3.80 square feet, which falls short of the required 5.7 square feet. These windows are designed to maximize natural light and ventilation in utility rooms, laundry rooms, or basement living spaces that already have an approved egress door or window.
For a complete breakdown of hopper window capabilities and code limitations, see our Hopper Window Complete Guide.
Why is it critical not to drill or fasten through the window sill?
The sill of a vinyl hopper window is engineered with a built-in drainage track and weep holes designed to collect water condensation or rain droplets and channel them safely to the exterior. If you drill a hole through the sill to drive an anchor screw, you puncture this drainage barrier. Water will seep through the screw hole, rotting out the wood buck underneath and eventually causing structural damage and mold growth inside your basement walls.
How do you prevent the frame from bowing during insulation?
To prevent the side jambs and header from bowing inward, always use a dedicated window-and-door low-expanding foam that meets ASTM C1620 standards. Do not overpack the gap with backer rod or fiberglass insulation.
Additionally, we highly recommend keeping the window sash fully closed and locked while the foam cures. The locked sash acts as an internal brace, holding the vinyl frame perfectly straight against the minor expansion pressure of the foam.
Conclusion
A large hopper windows install is a fantastic investment that instantly improves the comfort, air quality, and brightness of your lower level. However, because of the sheer weight and strict shimming tolerances required for larger vinyl units, proper installation is a highly technical task.
At Rooster Windows and Doors, LLC, we pride ourselves on delivering flawless, exceptionally energy-efficient window installations across the entire Chicagoland area. From Mundelein and Lake Zurich to Schaumburg, Northbrook, and down into Chicago, our experienced teams understand the unique architectural demands of local homes. We ensure that every window is perfectly plumb, heavily insulated against freezing winter drafts, and sealed to withstand the wettest spring rains.
If you want to upgrade your basement with beautifully crafted, high-performance windows tailored exactly to your home’s specifications, explore our options for Custom Hopper Windows and contact our team today. For homeowners researching options across the country, maintaining high installation standards is always the key to long-term performance, as emphasized by regional leaders like Comfort and Trust – Lake Forest, CA Replacement Windows . Let us handle the heavy lifting and precise engineering to give you a basement space you will love for decades to come!

