

How Skylight Window Installation Works
A sound skylight installation starts with the roof, not the glass. Choose a unit that suits the roof pitch, check the framing, and size the opening to the manufacturer’s instructions. Then secure the skylight, layer the underlayment and flashing so water drains over the roofing, and insulate and seal the opening inside. Cutting rafters or working on a roof calls for a qualified professional.
A skylight can brighten a room, but poor flashing can let in water, and an uninsulated opening can lose heat. The guide below explains how each layer helps protect your home.
I’m Piotr Wilk. My team has more than two decades of residential window and door installation experience in Chicagoland, and I’ll use that background to walk you through skylight window installation from framing to flashing.
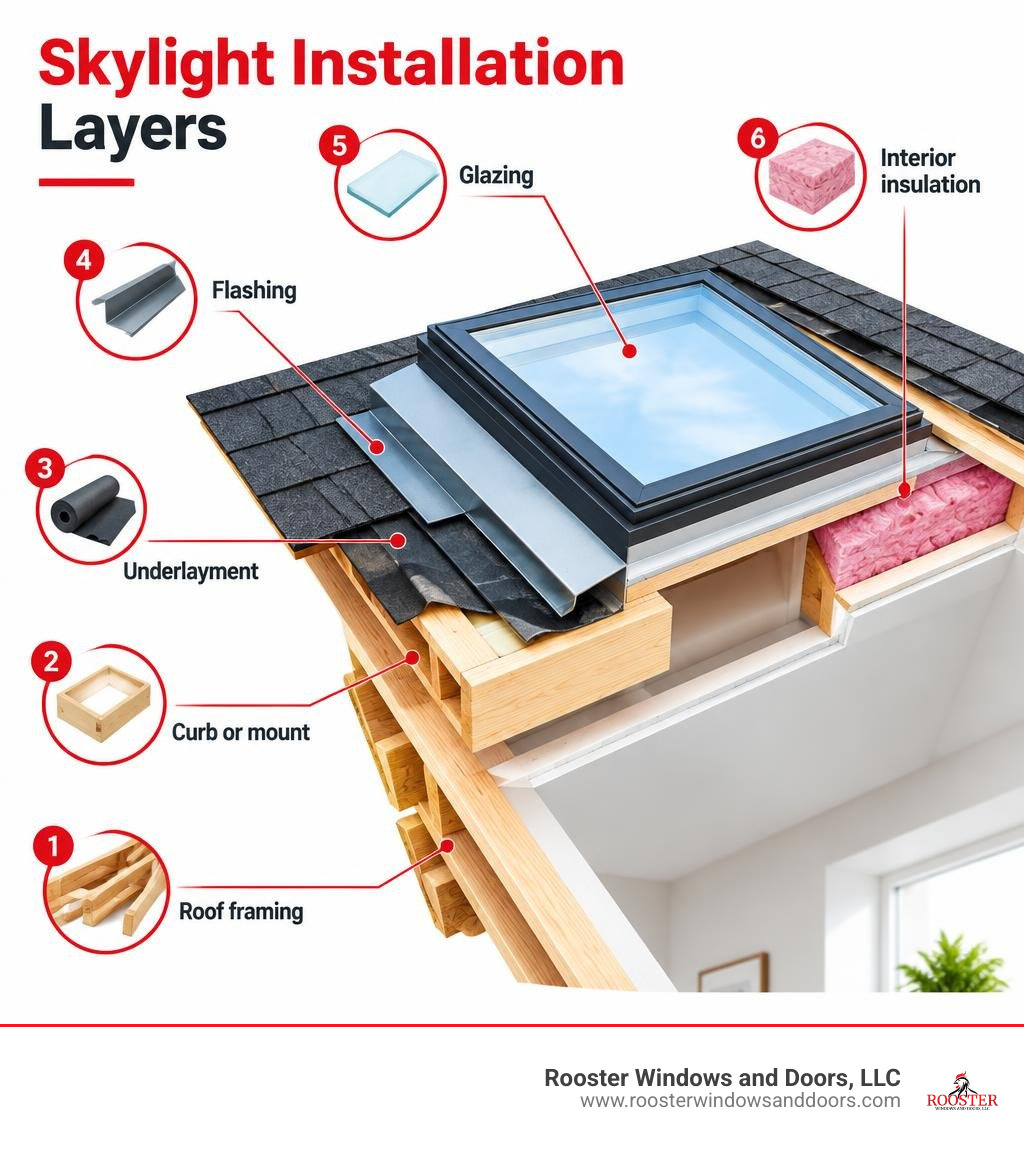
Skylight window installation terms you need:
Types and Energy Performance of Roof Skylights
Choosing the correct roof daylighting system requires balancing architectural framing styles with thermal dynamics. Sloped glazing receives almost twice as much heat as an unprotected vertical west-facing window of the same area, and its heat transfer rate is typically 40% greater than standard vertical glass. Choosing high-performance glass and frame materials is essential for year-round indoor comfort.
When planning a layout, architectural tools such as a 3D roof window layout modeling guide help you visualize slope angles and room illumination before cutting into your roof decking.
The primary physical styles include:
- Deck-Mounted Units: Fastened directly to the roof deck with integrated insulated collars. They provide a low-profile aesthetic that blends smoothly into pitched roofs.
- Curb-Mounted Units: Built on top of a raised wooden frame (curb). This style elevates the glass above the drainage plane, making it ideal for low pitches and flat roofs.
- Tubular Daylighting Devices (TDDs): Compact, highly reflective tubes that capture roof sunlight and channel it into interior spaces like hallways and closets.
- Fixed Models: Sealed glass units designed solely to provide daylight without opening.
- Vented Models: Operable units (manual, electric, or solar-powered) that open to exhaust hot air and improve interior ventilation.
For maximum thermal control, prioritize units equipped with low-emissivity (low-E) coatings and argon gas fills between panes. These features reduce solar heat gain coefficient (SHGC) values during hot summers while keeping interior heat inside during freezing winters. Built-in interior condensation gutters catch minor indoor moisture droplets and channel them outward, protecting the ceiling structure. For broader upgrades across your entire home, explore our insights on energy efficient window installation.
| Skylight Type | Typical Roof Pitch Compatibility | Best Architectural Applications | Primary Energy Advantage |
|---|---|---|---|
| Deck-Mounted | 14° to 85° (Pitched roofs) | Modern steep roofs, finished attics | Low profile, excellent thermal perimeter seal |
| Curb-Mounted | 0° to 60° (Flat to pitched) | Flat roofs, low slopes, replacement units | Elevated glass surface prevents standing water leaks |
| Tubular (TDD) | Any pitch (Adaptable flashing) | Hallways, walk-in closets, bathrooms | Minimal heat loss/gain due to small surface footprint |
Skylight Spacing and Daylighting Calculations
A standard roof window can admit more than three times as much natural light as a vertical window of identical dimensions. To avoid overheating your living space or creating harsh glare, daylighting ratios must be calculated carefully:
- The 3% to 5% Floor-to-Skylight Ratio: For conventional skylights, the total glass area should equal 3% to 5% of the total floor area of the room being illuminated. For high-efficiency tubular devices, 1% to 2% is sufficient.
- The 1.5x Height Spacing Rule: For rooms receiving multiple units, space skylights at a distance equal to approximately 1.5 times the floor-to-ceiling height to deliver even light distribution without dark zones.
- Orientation and Sun Path: South-facing roof slopes maximize solar heat gain in winter, while north-facing orientations provide cool, consistent visible transmittance throughout the day.
Step-by-Step Skylight Window Installation Process
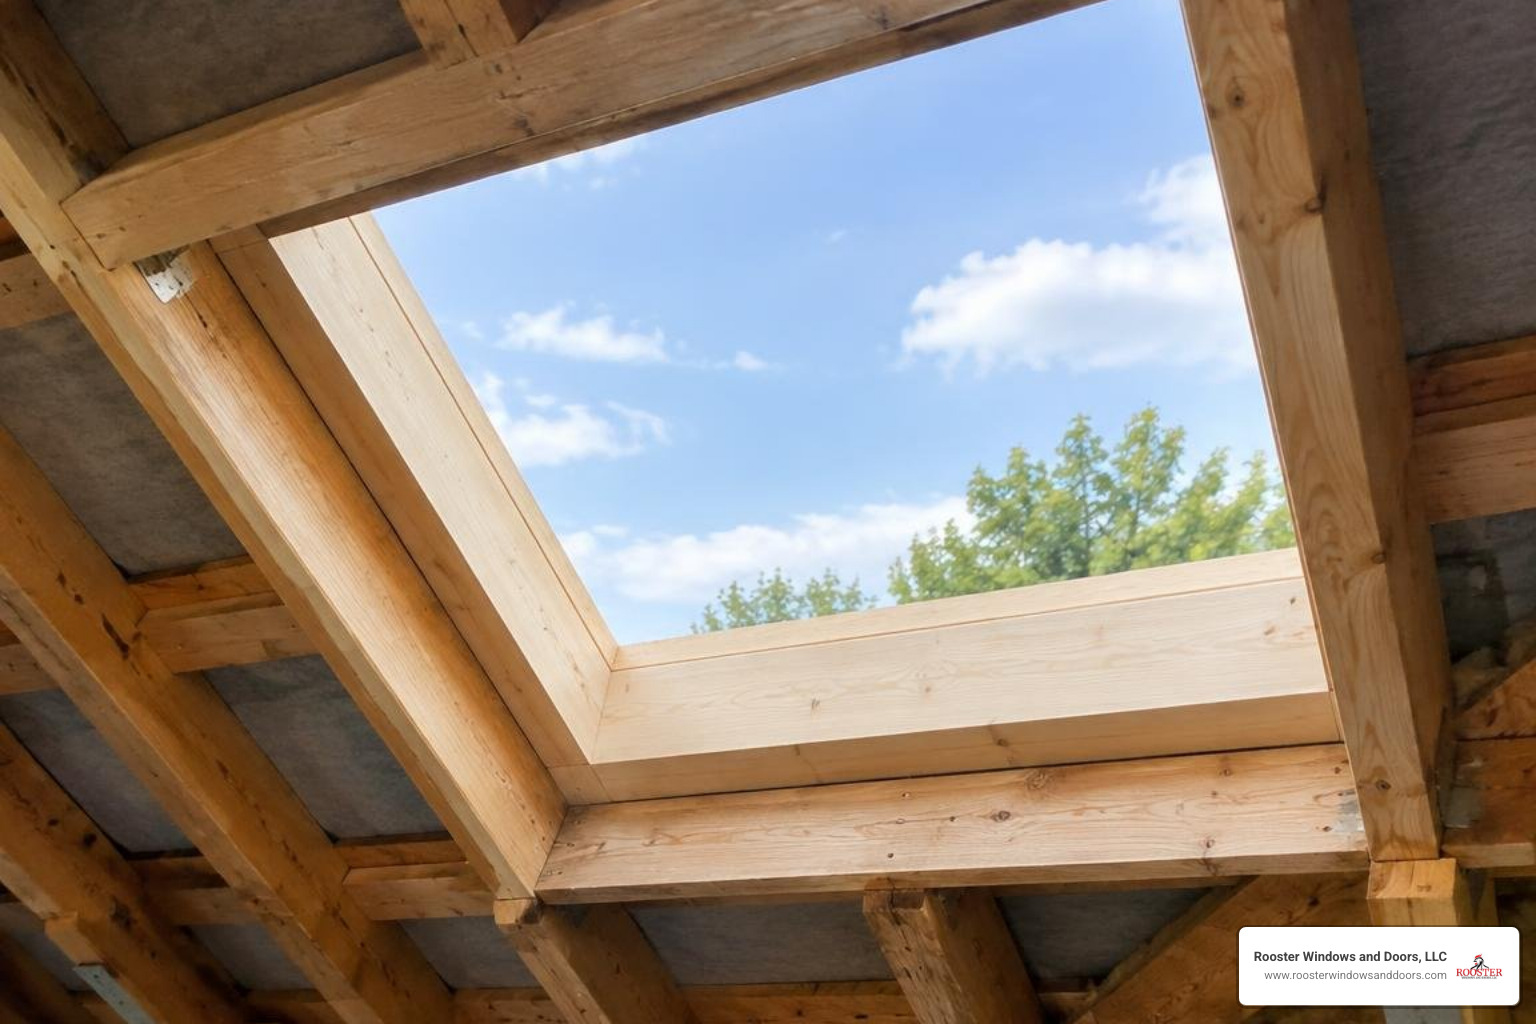
Installing a roof skylight involves careful carpentry, moisture management, and interior finish work. Altering structural roof trusses requires building temporary support walls and installing doubled-up structural headers to carry snow and wind loads safely. If your layout requires non-standard framing dimensions, reviewing our custom size windows ultimate guide helps ensure rough openings remain structurally sound.
Once the roof framing is set, constructing the interior light shaft requires attention to detail. Splay the top and bottom shaft walls—making the top vertical and the bottom horizontal—to spread daylight deep into the living space. Insulate all light shaft walls with rigid foam or fiberglass batt to prevent drafts, following proven methods for how to insulate windows.
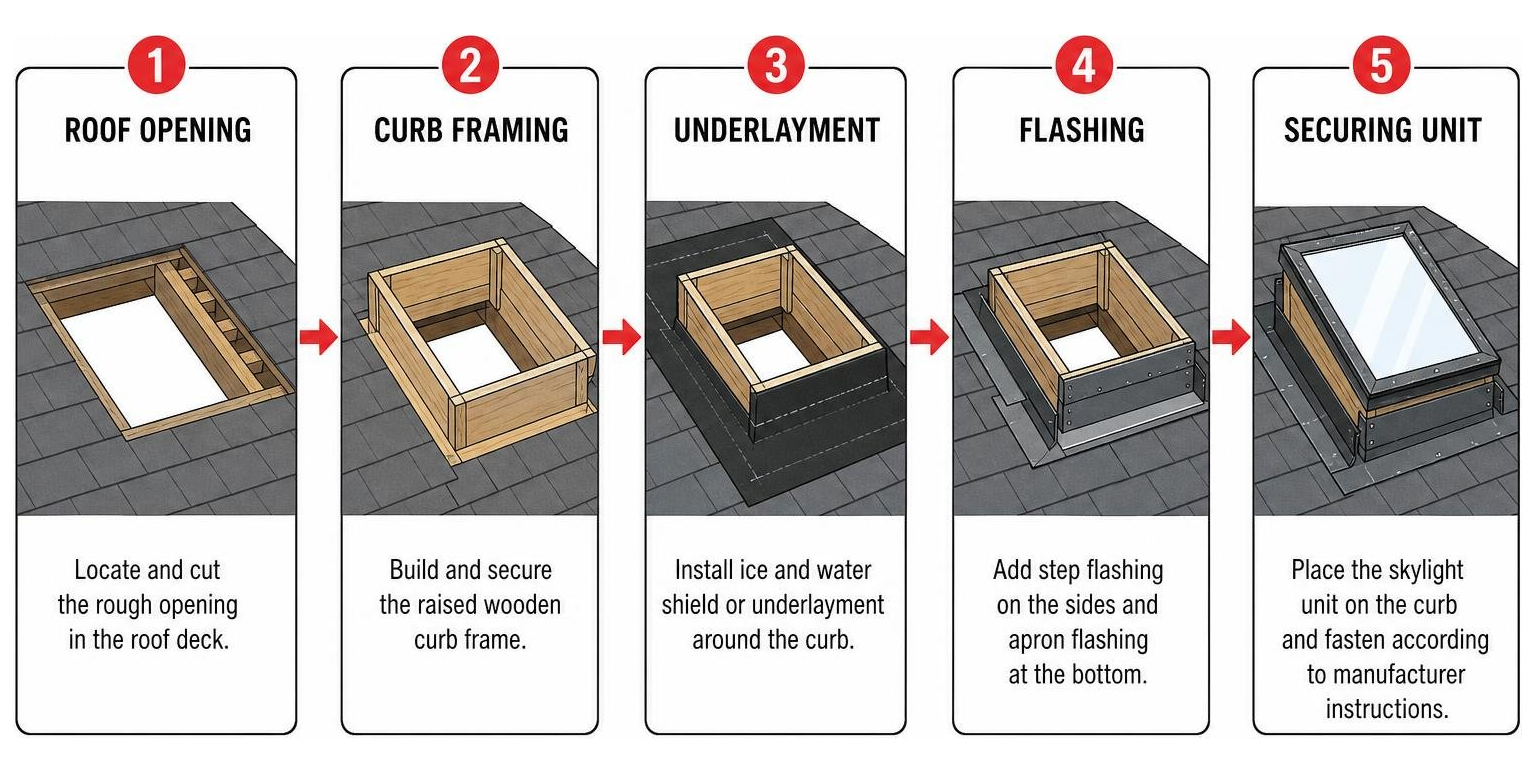
Preparing the Roof Opening and Curb Mount Framing
When installing a curb-mounted unit, follow the manufacturer’s exact specifications, such as the FCM curb-mounted skylight installation instructions.
- Cut the Rough Opening: Locate the roof rafters from inside the attic, mark the opening dimensions, and cut away the drywall and roof sheathing cleanly.
- Construct the Timber Curb: Build a rectangular box using 1.5-inch nominal lumber (2×4 or 2×6 framing). Ensure the curb stands at a minimum height of 3.5 inches (or at least 4 inches in snowy regions) above the roof deck.
- Fasten the Curb: Secure the curb square and plumb directly into the structural roof rafters and new cross headers.
- Extend the Interior Vapor Barrier: Pull the building’s ceiling vapor retarder up to the top outside edge of the wooden curb, securing it tightly to prevent humid household air from entering the roof cavity.
Flashing and Waterproofing for Skylight Window Installation
Waterproofing makes or breaks every skylight window installation. A leak-free seal requires layered, shingle-lapped water shedding:
- Self-Adhesive Waterproof Membrane: Wrap the entire perimeter of the wooden curb with self-adhesive membrane underlayment. Extend the membrane at least 6 inches up the curb sides and 6 to 12 inches out over the surrounding roof sheathing, overlapping existing roofing felts to shed water cleanly.
- Clearance Buffers: Maintain clearances of 12 to 24 inches between the curb and nearby roof valleys, ridges, or vertical side walls to allow clear drainage pathways.
- Engineered Flashing Kits: Match the flashing kit directly to your roof pitch and roofing material. For thin materials like asphalt shingles on slopes between 10° and 60°, use low-profile step flashing (such as VELUX ECL). For profiled tile or standing-seam metal roofs between 14° and 60°, use corrugated flashing (such as VELUX ECW).
- Integrated Step Flashing: Interweave individual step flashing pieces with each row of shingles, working from the bottom sill apron up along the sides to the top header backpan. For more sealing best practices, explore our guide on window door weatherproofing.
Securing the Skylight and Mounting Interior Accessories
With underlayment and flashing base layers secured, set the skylight unit over the curb:
- Center and Fasten: Center the skylight unit square on top of the curb. Fasten it using heavy-duty, corrosion-resistant #8 1¾-inch pan-head stainless steel screws through the factory pre-drilled side mounting holes. Do not overtighten, which can distort the perimeter gaskets.
- Glazing Safety Protocols: Always verify your unit features tempered outer glass and laminated inner glass. If heavy impacts or tree limbs shatter the outer surface, the laminated inner pane holds broken glass fragments securely together.
- Install Interior Shading Systems: For light and heat control, mount custom cellular blinds following the Skylight Shading System Installation Guide. Mount side brackets within 1.5 inches of track edges, install light-blocking side channels, adjust cord tension evenly to eliminate slack, and program motorized solar-powered remotes for smooth open-and-close cycles.
Cost Breakdown and Key Pricing Factors
Budgeting for a daylighting project requires evaluating both unit materials and professional labor costs. To see how these figures compare to vertical window projects, check our breakdown on window installation costs.
Estimating Skylight Window Installation Costs and Labor Expenses
- Basic Fixed Skylight Units: Material-only costs for a standard glass unit typically run between $250 and $500, with total installed costs ranging from $1,000 to $1,900.
- Vented Manual Skylights: Total turnkey costs generally range from $1,500 to $2,300 per unit, including standard flashing kits.
- Solar-Powered and Electric Operable Skylights: Premium automated units featuring rain sensors and remote-controlled cellular shades range from $2,200 to $3,500+ installed.
- Professional Labor Charges: Skilled roof carpentry and weatherproofing labor typically ranges from $50 to $100 per hour, or $400 to $1,000 in dedicated labor per standard opening.
Key Factors Influencing Total Installation Pricing
- Roof Pitch and Height: Steeply pitched roofs (such as 10:12 or 12:12 slopes) require specialized fall-arrest scaffolding and slow the installation pace, increasing labor costs.
- Light Shaft Length and Framing: A direct vaulted-ceiling installation requires less framing and drywall work than a deep attic space needing an 8-foot finished, insulated drywall shaft.
- Roofing Material Types: Asphalt shingle integration is straightforward. In contrast, slate, concrete tile, or standing-seam metal roofs require custom flashing fabrication and careful hand tooling.
- Accessibility Challenges: Multi-story homes or dense urban lots with difficult roof access may require crane or specialized lift rentals at approximately $125 to $200 per hour.
Troubleshooting Common Skylight Issues and Routine Maintenance
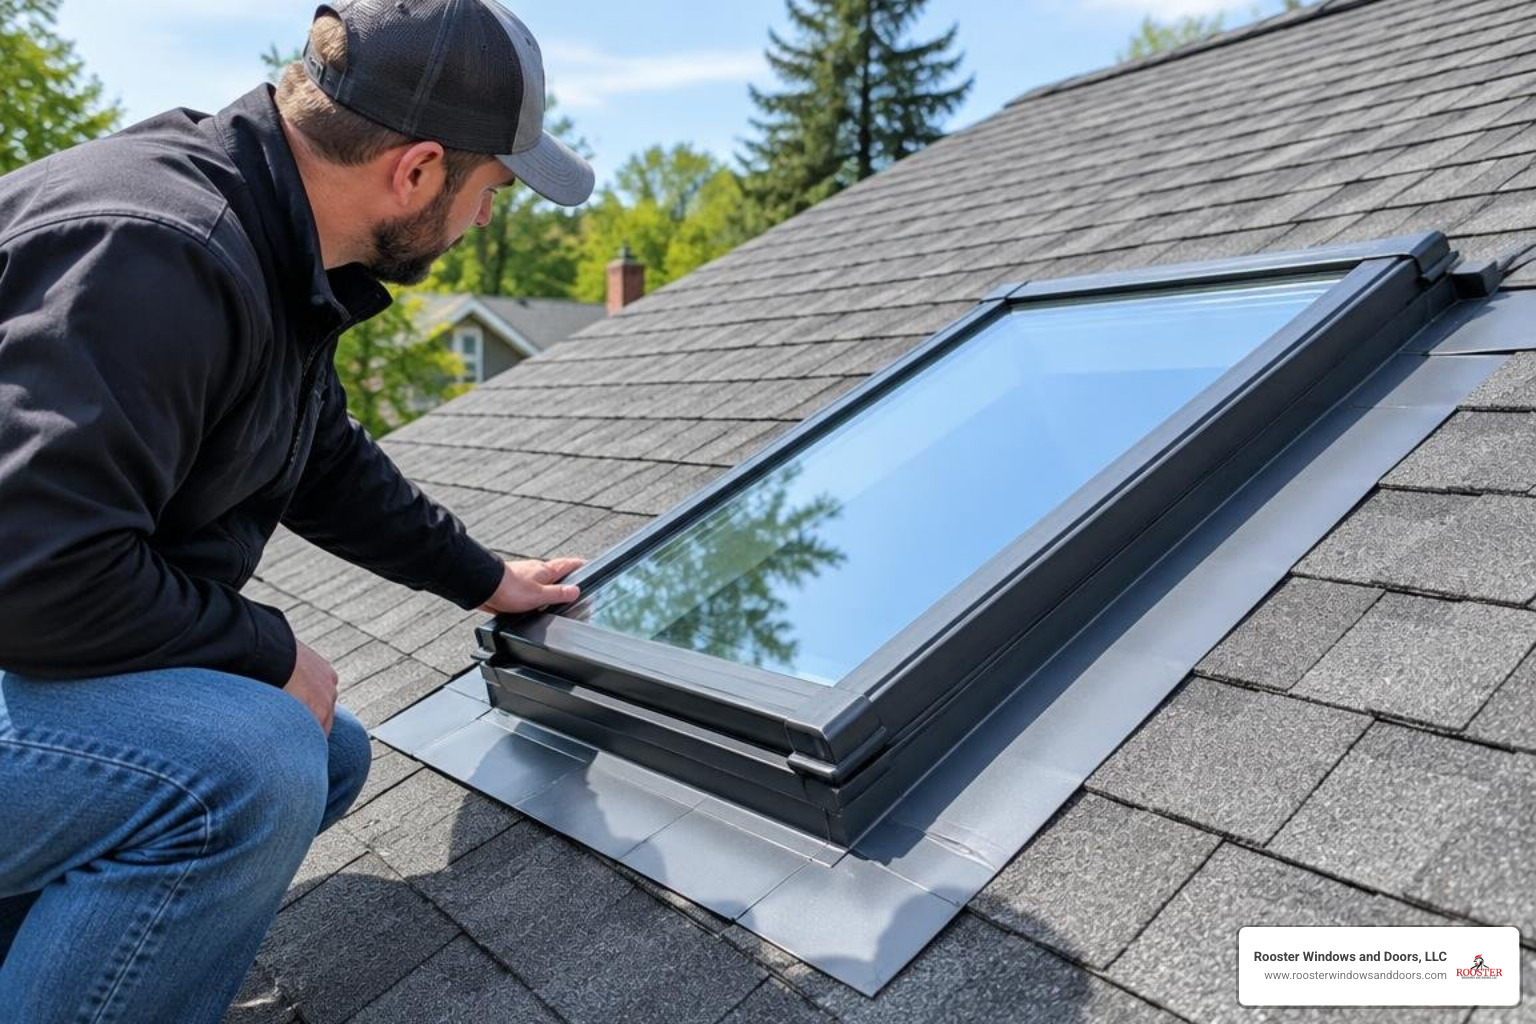
A well-installed roof skylight should provide decades of dependable daylight. However, regular maintenance keeps issues from developing:
- Managing Condensation: Interior moisture droplets on the glass typically indicate high indoor humidity rather than an exterior roof leak. Maintain good indoor air circulation, run bathroom exhaust fans, and review our tips on condensation on windows.
- Leak Detection and Flashing Repairs: If water stains appear on the light shaft drywall, check the top header flashing and side step-flashing pieces for wind-blown debris, cracked sealants, or ice dam backups. Clear leaf litter from roof channels twice a year.
- Preventing Mold and Wood Rot: Inspect wooden curb frames annually for water stains or peeling paint. Refinish exposed interior timber every 4 to 6 years, and lubricate the hinges and drive chains of operable units with silicone spray.
- Draft Prevention: If cold air drops into the room, inspect the interior shaft drywall insulation. You can address air drafts by consulting our solutions for drafty window problems. For long-term care guidelines, review our comprehensive window maintenance schedule.
Safety Protocols and Building Code Compliance
Roof work carries inherent risks that require strict safety practices:
- Fall Protection and OSHA Compliance: Installers must use OSHA-compliant fall-arrest harness systems tied to structural roof anchors, along with secure ladder tie-offs and roof staging planks.
- EPA Lead-Safe Work Practices: When cutting into interior ceilings of homes constructed before 1978, follow EPA guidelines for containing lead paint dust using HEPA filtration and plastic containment barriers.
- International Building Code (IBC) Glazing Rules: Modern codes mandate tempered glass on exterior panes and impact-resistant laminated glass on interior surfaces whenever skylights are mounted above living spaces.
- Maximum Roof Area Fire Limits: Building codes generally cap total combustible daylighting area at a maximum of 20% to 25% of the total roof plane, with strict set-back clearances from adjoining property boundary walls. Partnering with certified window installers ensures your project complies with all local Chicagoland building regulations.
Frequently Asked Questions About Skylights
What roof pitch is suitable for curb-mounted skylights?
Curb-mounted skylights (such as standard FCM models) are versatile units engineered for roof pitches ranging from 0° (completely flat) up to 60° (a steep 21:12 slope). However, manufacturer no-leak warranties often require a minimum pitch (such as 10° for thin-shingle ECL flashing and 14° for profiled-tile ECW flashing). On pitches below 15°, we recommend building a slight 3° to 5° pitch into the curb itself to facilitate water and snow runoff and reduce condensation pooling.
How does a skylight differ from a standard roof window?
While both are installed in the roof, a skylight is typically mounted out of reach high on a ceiling or deep within an attic light shaft primarily to deliver daylight. A roof window is designed within arm’s reach on steeply pitched habitable attic spaces, features a center-pivot or top-hung sash for manual operation, and often meets emergency egress escape opening regulations.
How often should skylight flashing and seals be inspected?
Inspect your skylight flashing, perimeter drainage channels, and glass seals at least twice a year—ideally in spring and late autumn. Clear away fallen leaves, pine needles, and roofing grit from around the top backpan and side step flashings. Check moving hardware on vented units annually and lubricate gears with silicone grease to ensure tight weather sealing.
Conclusion
A successful roof window installation brings natural daylight and ventilation deep into your home while maintaining complete weather resistance and energy efficiency. The key is precise execution at every stage: framing an opening with structural headers, building a curb to exact dimensions, sealing the perimeter with self-adhesive underlayment, and interweaving the flashing with surrounding roofing materials.
When you’re ready to brighten your living space with energy-efficient daylighting, partner with experienced professionals who prioritize safety and craft. At Rooster Windows and Doors, LLC, we bring decades of hands-on structural expertise to homeowners across Chicago, Arlington Heights, Evanston, and surrounding communities. Contact our team today to schedule an on-site consultation and explore our full range of professional window installation options.

