

The Ultimate Guide to Kitchen Hopper Window Installation
Why a Proper Hopper Windows Kitchen Install Makes All the Difference
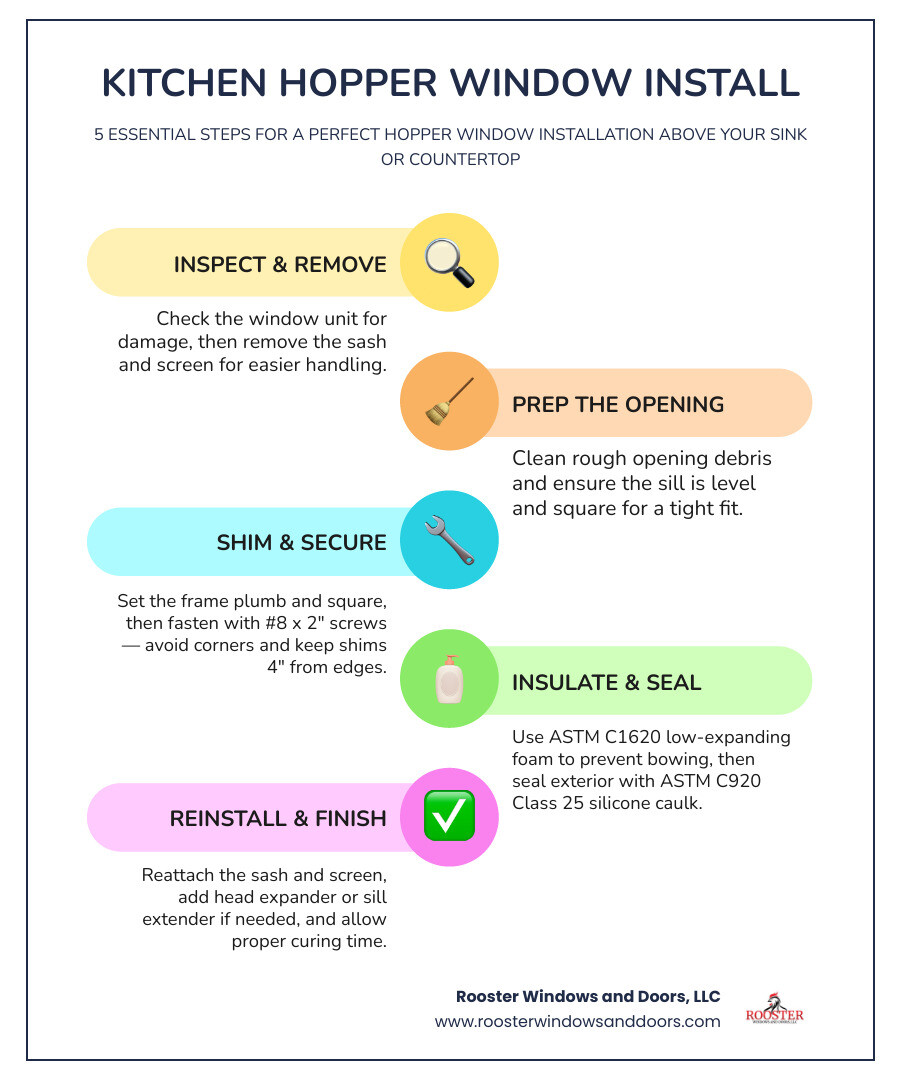
Here’s the short answer on how to install a hopper window in a kitchen:
- Inspect the window unit and remove the sash and screen.
- Prepare the rough opening — clean it out and level the sill.
- Set the frame in the opening and check it is plumb and square.
- Shim and secure the frame using #8 x 2″ Phillips pan head screws.
- Insulate with ASTM C1620 low-expanding foam and seal the exterior with ASTM C920 Class 25 silicone caulking.
- Re-install the sash, screen, and any accessories like a head expander or sill extender.
Kitchen hopper windows are one of the most practical ventilation upgrades you can make. They hinge at the bottom, open inward, and sit perfectly above a sink or countertop — where airflow matters most and space is tight.
But a hopper window only performs well when it is installed correctly. A frame that bows even slightly can cause the sash to stick, gaps to form, and drafts to creep in. The shimming, sealing, and fastening steps are not optional details — they are what separates a window that lasts decades from one that causes problems within a year.
This guide walks you through every step of the process, from opening prep to final caulk line, using manufacturer-grade techniques that protect both your home and your investment.
I’m Piotr Wilk, and over more than two decades of residential window and door installations across the Chicagoland area, I’ve completed countless hopper windows kitchen install projects in homes ranging from single-family bungalows to multi-unit buildings throughout Lake, Cook, and McHenry County. Everything in this guide reflects the real-world precision that goes into every installation we complete at Rooster Windows and Doors, LLC.
Hopper windows kitchen install word roundup:
Planning Your Hopper Windows Kitchen Install
Planning a hopper windows kitchen install requires looking closely at how your kitchen is used. Unlike basement installations where the window is often high up and out of the way, a kitchen hopper window is typically positioned directly above a sink, countertop, or prep station. This means you must carefully measure your countertop clearance and faucet height to ensure the inward-swinging sash does not strike anything when opened.
When choosing the right Kitchen Windows, the hopper style stands out because it allows hot air and steam from cooking to escape quickly. However, because the sash tilts inward, you must have at least several inches of clear projection space. If you have a high-arc faucet, you may need to offset the window or choose a unit with a restricted opening angle. To get a better grasp of how these windows operate before diving into the installation, check out our Beginners Guide to Hopper Windows.
Safety, Regulations, and Lead Paint Compliance
Before you pick up a drill, you must consider the age of your home. If your property in Libertyville, Highland Park, or Chicago was built before 1978, there is a high probability that the existing window frames contain lead-based paint.
Under the U.S. Environmental Protection Agency’s (EPA) Lead-Based Paint Renovation, Repair, and Painting Program (RRP Rule), specific lead-safe work practices must be followed. Disturby lead paint without proper containment can release toxic dust into your kitchen.
- Containment: Use heavy plastic sheeting to seal off the kitchen work area from the rest of the house.
- Debris Disposal: Double-bag all old wooden sashes, paint chips, and plaster debris in heavy-duty contractor bags.
- Personal Protection: Wear a certified N100 or HEPA-rated respirator, safety glasses, and disposable gloves.
- Cleaning: Never dry sweep lead dust. Use a HEPA-shielded vacuum and wet-mop all surfaces thoroughly after the installation is complete.
Required Tools and Materials for a Hopper Windows Kitchen Install
To achieve a flawless, professional installation, you need the right tools on hand. Using the wrong fasteners or cheap sealants will lead to structural failure, drafty frames, or water leaks.
Here is the essential list of tools and materials required for a vinyl hopper window installation (specifically block-frame units with a standard 3 1/4″ main frame depth):
- Measuring & Leveling Tools: Tape measure, 2-foot level, torpedo level, and a combination square.
- Fasteners: #8 x 2″ Phillips pan head screws (for primary frame securing) and #6 x 1/2″ Phillips pan head screws (for optional head expanders).
- Shims: High-quality cedar or composite shims (always use in pairs).
- Insulation: Low-expanding polyurethane window and door foam complying with ASTM C1620 standards.
- Sealants: High-grade exterior silicone caulking meeting ASTM C920, Class 25 performance standards.
- Hand Tools: Utility knife, putty knife, pry bar, drill with driver bits, and a rubber mallet.
Step-by-Step Hopper Window Installation Guide
Installing a vinyl hopper window without a nail fin (often called a block frame or pocket window) requires careful attention to detail. Because there is no exterior nail fin to hold the window in place, the entire structural load of the window relies on proper shimming and mechanical fastening through the side jambs.
For a deeper dive into general window replacement standards, you can refer to our Window Installation Services Complete Guide or explore our main Window Installation services page.
Step 1: Inspecting the Unit and Removing the Sash and Screen
Never tear out your old kitchen window until you have thoroughly inspected the new replacement unit.
- Check the vinyl frame for cracks, scratches, or shipping damage.
- Verify that the dimensions match your rough opening measurements.
- Remove the screen by gently pulling the tension tabs inward and lifting the screen frame out of its track.
Next, you must remove the window sash to prevent damage and make the frame light enough to maneuver.
- Standard Ceiling Application: Open the sash slightly, locate the release mechanism on the side arms or hinges, and slide the sash out of the frame tracks.
- Deep-Pocket (Well) Ceiling Application: In tight kitchen areas or deep-pocket masonry openings where overhead clearance is limited, you cannot easily tilt the sash out. In these cases, you must remove the black plastic stops located inside the frame tracks. Once the stops are out, slide the sash arms down to the designated frame cutouts to release the sash. Note: Keep these black stops in a safe place, as you will need to re-install them later to prevent the sash from sliding out of alignment during daily use.
Step 2: Preparing the Rough Opening and Sills
With the old window removed, scrape away all old caulk, paint, and loose mortar from the rough opening. Any debris left behind will prevent the new window from sitting flat.
If you are replacing an old basement-style hopper window in a masonry kitchen wall, you can read our guide on How to Install New Basement Window for specific masonry anchoring tips.
- Flat Sills vs. Sloped Sills:
- If the opening has a flat sill, place your shims directly on the sill plate at both ends of the opening where the side jambs will rest.
- If the opening has a sloped sill, you must use contrasting wedge pairs (two shims facing opposite directions) to create a perfectly flat, level platform. This prevents the window frame from tilting toward the interior or exterior of your kitchen.
- Critical Step: For window units 36 inches wide or greater, you must place an additional shim pack in the center of the sill. This prevents the heavy vinyl sill from deflecting or sagging under the weight of the glass.
Step 3: Setting, Shimming, and Securing the Frame
Lift the empty window frame into the rough opening. Before driving any screws, perform a “plane check” to ensure the frame is flush with the interior wall and not twisted or racked.
The Critical Rules of Shimming:
- The 4-Inch Rule: Never place shims within 4 inches of the top or bottom corners of the frame. Shimming too close to the corners pinches the vinyl welds and distorts the frame, preventing the sash from sealing.
- The 12-Inch Rule: If the vertical spacing between your side jamb shims exceeds 12 inches, you must add intermediate shims to maintain straight, even margins.
- The 24-Inch Rule: Check the factory-prepped screw holes in the side jambs. If the distance between these screws is greater than 24 inches, you must drill and add additional jamb screws to stabilize the frame.
Secure the frame by driving #8 x 2″ Phillips pan head screws through the pre-drilled holes in the side jambs and directly into the wood framing or masonry anchors. Never drive screws through the bottom sill of the window. Doing so punctures the water barrier and will lead to water leaking directly into your kitchen walls.
Step 4: Insulating and Sealing the Window
Once the frame is secured and you have verified that the margins are perfectly even, it is time to insulate.
Use an ASTM C1620 compliant, low-expanding polyurethane foam. Standard high-expansion spray foams exert immense pressure as they cure, which will easily bow the vinyl jambs inward. Gently fill the gap between the window frame and the rough opening, leaving a small amount of space for the foam to expand.
On the exterior of the window, apply a continuous bead of ASTM C920, Class 25 silicone sealant between the vinyl frame and the exterior siding or masonry.
Pro Tip: Never block, cover, or caulk over the weep holes at the bottom of the window frame. These holes are engineered to drain water away from the glass track. Blocking them will cause water to back up and flood your kitchen countertop.
Step 5: Re-Installing the Sash, Screen, and Accessories
Once the foam has skinned over, you can re-install the sash and screen.
- Align the sash arms with the frame cutouts and slide the sash back into its hinges.
- If you are working in a deep-pocket ceiling, re-install the black plastic stops to lock the sash arms into their tracks.
- Install the screen by pressing it into the outer track until the spring clips snap into place.
If your rough opening is slightly taller than your window frame, you can install a head expander (a vinyl channel that slips over the top of the window) using #6 x 1/2″ Phillips pan head screws. If there is a gap at the bottom, snap on a sill extender.
Warning: Do not install the sill extender before the low-expanding foam underneath has fully cured. If you press the extender down against wet foam, the expanding pressure will bow the window sill upward.
Troubleshooting and Post-Installation Adjustments
Even with careful planning, minor alignment issues can crop up during installation. Vinyl is a flexible material, and small shifts in your home’s framing can impact how the window operates.
If you encounter persistent alignment issues that aren’t covered below, you can consult the official ProVia Installation Support documentation for detailed technical diagrams.
Troubleshooting Common Issues During a Hopper Windows Kitchen Install
The most common issues during a kitchen installation involve frame bowing or uneven margins. Because kitchen walls can expand and contract with humidity from cooking, keeping your clearances exact is essential.
| Symptom | Common Cause | Corrective Action |
|---|---|---|
| Sill bows upward | Over-insulating with high-expansion foam; or installing a sill extender before the foam cured. | Carefully cut away excess foam from beneath the sill; check that center shims aren’t forced too tight. |
| Header bows downward | Shims placed too tight at the top corners; or house settling pressure. | Remove top corner shims (ensure compliance with the 4-inch rule); back off the top installation screws slightly. |
| Sash sticks or binds | Frame is “racked” (out of square) or twisted in the opening. | Check diagonals of the frame with a tape measure. Adjust side jamb shims to restore a perfect rectangle. |
| Sash pops open on its own | Latches are misaligned; or frame is bowed outward in the middle. | Check side jamb margins. Add shims behind the middle of the jambs to push the frame back into alignment. |
Frequently Asked Questions about Hopper Windows
Can you install a hopper window in a kitchen without a nail fin?
Yes! In fact, most replacement window projects in existing kitchens are done using “block frame” (non-nail fin) windows. This is often referred to as a pocket installation. It allows us to slide the new window frame directly into the existing wood opening without tearing out your exterior siding, kitchen backsplashes, or interior trim. To see how we build these units to your exact specifications, take a look at our Custom Made Windows options.
How do you prevent the window frame from bowing during foam insulation?
To prevent bowing, always use a dedicated window and door foam that meets ASTM C1620 standards. These foams are formulated to exert minimal pressure during expansion. Additionally, never pack the gap tight with foam; apply a light bead and let it expand naturally. For added peace of mind, you can temporarily clamp a straight piece of wood (a “strongback”) across the inside of the window frame to hold the jambs perfectly straight while the foam cures.
What is the difference between installing a hopper window and a garden window in a kitchen?
While both are fantastic options for a kitchen, they serve very different purposes:
- Hopper Windows: These open inward from the top, providing excellent, secure ventilation. They sit flush with the wall, making them perfect for tight spaces behind sinks where you don’t want a window protruding outside. Read more in our Hopper Window Complete Guide.
- Garden Windows: These project outward like a mini-greenhouse, creating a three-dimensional glass shelf for herbs and plants. They require much more structural support and exterior clearance. If you are considering this style instead, check out our guide on How to Install a Garden Window.
Conclusion
A successful hopper windows kitchen install brings fresh air, natural light, and modern efficiency to the heart of your home. However, because vinyl is highly sensitive to shifting, over-tightened fasteners, and improper shimming, precision is everything. Skipping a single step—like placing shims too close to the corners or using the wrong type of expanding foam—can lead to drafty frames and sticky sashes.
If you want the peace of mind that comes with a flawless, energy-efficient installation, we are here to help. At Rooster Windows and Doors, LLC, we bring years of local expertise to homeowners in Libertyville, Highland Park, Evanston, Gurnee, and across the greater Chicago area.
Ready to upgrade your kitchen? Explore our Custom Hopper Windows services and contact us today to schedule your professional installation!
