

Finish a Doorway Casing No Door for a Clean, Intentional Look
A doorway casing no door is usually finished like a standard interior door frame: add a flat jamb liner inside the opening, install casing on both wall faces, and leave out the door, hinges, and door stop.
- Use a jamb first to cover rough drywall edges and create a solid surface for trim.
- Set the casing with a consistent reveal, often about 1/4 inch from the jamb edge.
- Match nearby trim in profile, width, color, and corner style so the opening belongs in the room.
- Fill, caulk, sand, and paint to hide nail holes and seams.
A finished cased opening does more than improve appearance. It protects fragile drywall corners in busy passageways, creates a clear transition between rooms, and can make an open layout feel more polished. Trimless drywall wraps can work in modern homes, but traditional casing is often the better fit where the home already has visible baseboards, window trim, or detailed millwork.
I’m Piotr Wilk of Rooster Windows and Doors, LLC, and our team has more than two decades of residential window and door installation experience in the Chicagoland area, including the framing and finish details that affect a doorway casing no door. Next, let’s clarify what separates a true cased opening from a simple drywall wrap.
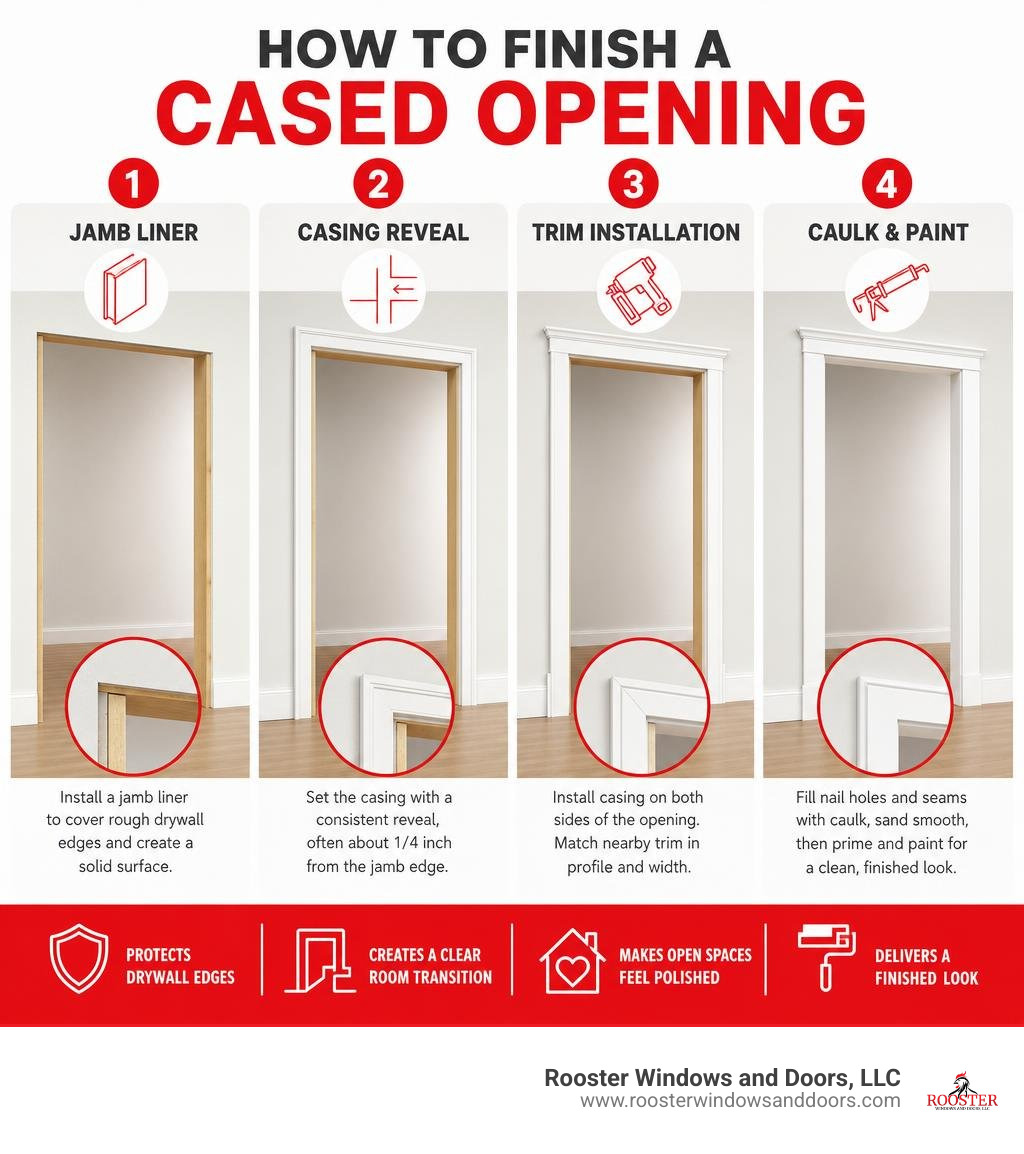
Doorway casing no door terms to know:
Understanding the Cased Opening: Drywall Wrap vs. Doorway Casing No Door
When homeowners across the Chicago suburbs decide to open up space between a kitchen and a dining room or create an inviting transition into a family room, they are often faced with a design choice: should the pass-through be a plain drywall wrap or a fully cased opening?
A drywall wrap—sometimes called a square drywall pass-through—uses metal or vinyl corner beads covered with joint compound to wrap around the wall stud framing. While popular in ultramodern homes due to its ultra-minimalist appearance, bare drywall edges in high-traffic corridors are vulnerable to damage. Daily foot traffic, children running through hallways, or carrying laundry baskets can easily dent drywall corners, chip off paint, or cause wallpaper to peel at the boundary line.
In contrast, installing a doorway casing no door creates a durable, wooden framework around the opening. By combining a smooth interior lining (the jamb) with face trim (the casing), you gain both physical protection and visual architecture. Instead of looking like a door was abruptly removed and forgotten, a cased opening feels completely intentional, anchoring the room’s design while directing natural light through the home.
To help you decide which treatment fits your home’s architectural language, here is how trimmed openings compare to alternative finishing methods:
| Feature | Cased Opening (Trim & Jamb) | Drywall Wrap (Trimless) | Creative Alternatives (Arches, Curtains, Sliding Panels) |
|---|---|---|---|
| Visual Style | Classic, Craftsman, or Modern Heritage | Ultra-minimalist, sleek, modern loft | Whimsical, historic, or flexible privacy |
| Corner Protection | High (Solid wood/MDF absorbs impacts) | Low (Drywall corner beads dent easily) | Moderate to High (Depends on framing) |
| Typical DIY Cost | $30 – $100 in basic materials | $25 – $80 (Mud, tape, corner bead) | $80 – $500+ (Custom arches or hardware) |
| Installation Skill | Intermediate carpentry | Intermediate drywall taping/sanding | Intermediate to Advanced carpentry |
| Best Room Application | Dining rooms, foyers, living areas | Minimalist modern homes, closets | Bungalows, home offices, cozy passages |
Understanding these distinctions is the first step toward transforming your doorway. For a comprehensive overview of trim styles and terminology, check out our Door Casing Guide as well as our detailed Door Trim Installation Complete Guide.
Why Installing a Jamb Matters for a Doorway Casing No Door
One of the most frequent questions we receive at Rooster Windows and Doors, LLC from DIYers is whether they can skip installing a wooden jamb and simply nail casing trim directly over the drywall edge. While it might sound like a time-saving shortcut, nailing casing straight onto drywall without a jamb liner leads to multiple finish quality problems.
First, drywall walls are rarely uniform in depth. Variations in sheetrock thickness, mud buildup around corner beads, and slight twists in wall studs mean the wall surface inside the passageway is uneven. If you attach face casing without a jamb, you will be left with ugly gaps between the back of the trim and the rough opening wall.
Second, a proper door jamb acts as a smooth bridge spanning the full thickness of the wall framing (typically 4 5/8 inches for standard 2×4 walls with 1/2-inch drywall). Installing a flat wooden jamb—made from solid pine, primed MDF, or even 1/4-inch finish plywood for tight openings—gives you a plumb, square surface to nail your casing against.
When you install a full jamb, you eliminate exposed wall interiors, conceal uneven stud gaps, and build a sturdy substrate that supports the molding. As highlighted in discussions on the Casing Around Doorway Forum, adding a full wooden jamb creates a significantly higher-end appearance than leaving drywall visible inside the passageway. If your existing doorway opening has damaged framing components, review our guide on Replacing Interior Door Frame before starting your casing project.
Planning and Materials: Preparing to Case an Open Passage
Proper preparation ensures clean cuts, tight miter joints, and a stress-free project. Before heading to the home improvement store, measure your opening’s width, height, and precise wall thickness at multiple points to account for wall bowing.
Material Selection and Cost Considerations for a Doorway Casing No Door
Selecting the right trim material depends on your home’s existing finishes, your budget, and whether you plan to paint or stain the trim:
- Medium-Density Fiberboard (MDF): Ideal for painted trim. MDF is budget-friendly, pre-primed, perfectly straight, and free of natural knots. However, it should be avoided in damp areas subject to frequent moisture exposure.
- Finger-Jointed Pine: Excellent for painted applications where added durability against physical kicks or bangs is required. It cuts cleanly and holds brad nails securely.
- Solid Hardwood (Oak, Maple, Poplar): Essential if you plan to stain the casing to match existing wood features. Poplar is also a top choice for high-end paint-grade finish carpentry due to its smooth surface and durability.
- PVC or Polyurethane: Best for high-humidity areas, basements, or areas near entry doors prone to moisture.
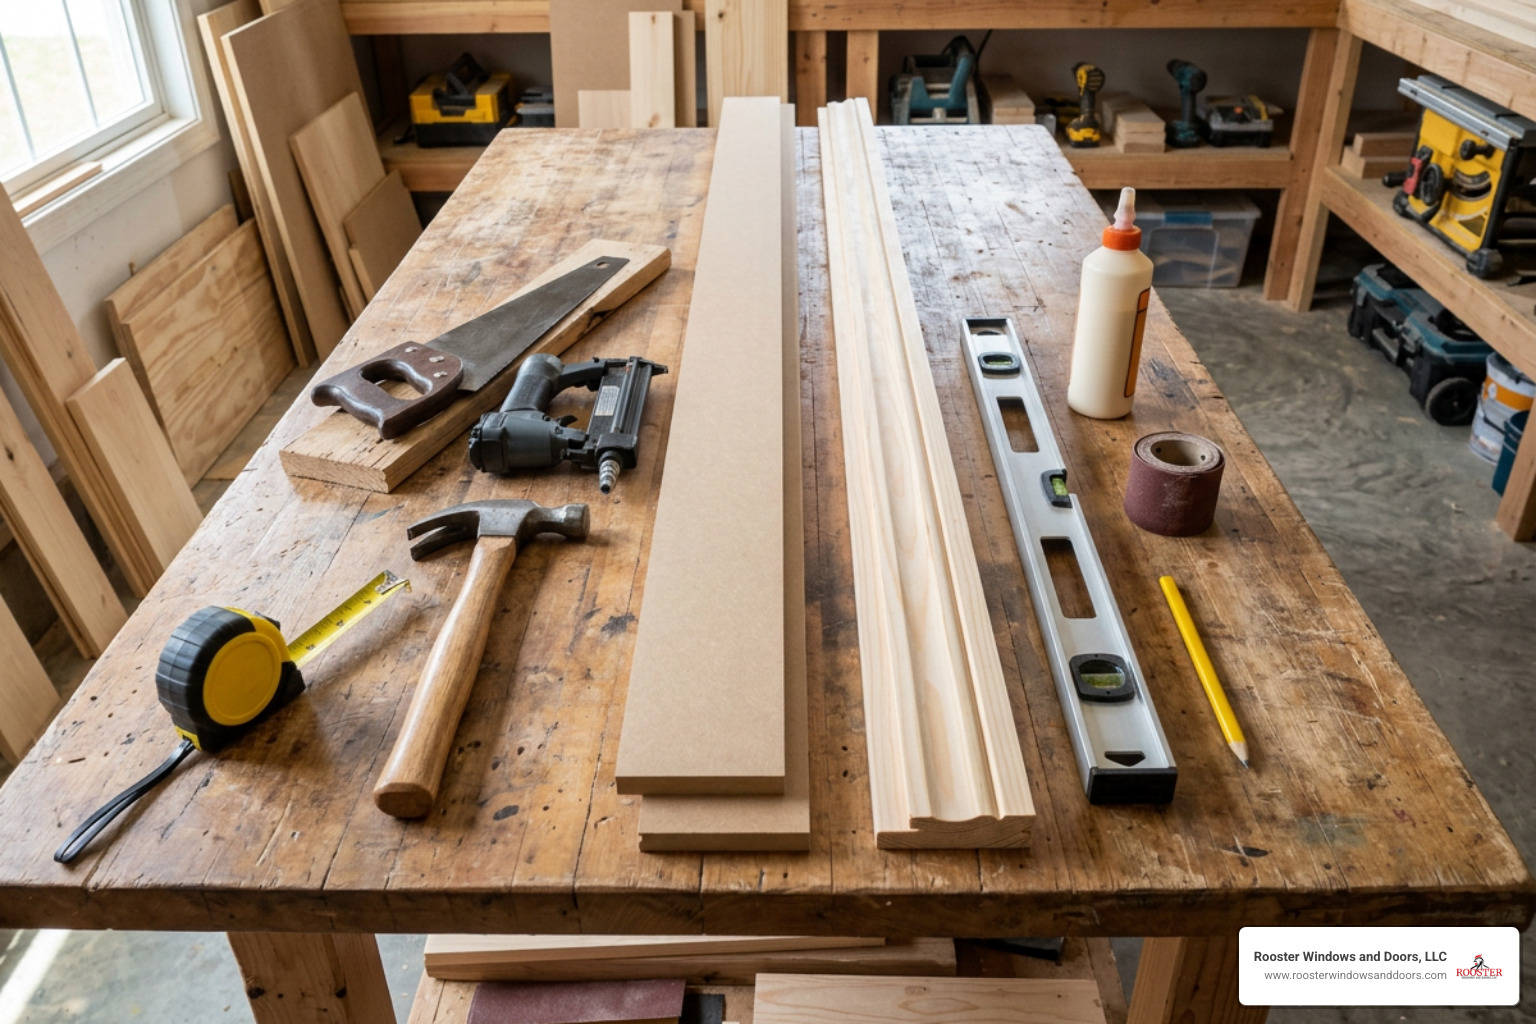
When calculating costs, finishing a doorless cased opening is remarkably budget-friendly. Pre-packaged jamb kits often cost around $18 to $25, while standard interior casing trim pieces generally range from $5 to $25 per piece depending on width and profile. Completing an entire cased opening—including drywall prep, jamb liners, and casing on both sides—typically costs between $40 and $90 in raw materials for a DIYer.
If you choose to hire professional carpenters, total project costs generally range from $150 to $400 for labor, depending on accessibility, wall levelling requirements, and local labor rates. To better understand finish carpentry pricing, check out our resource on the Cost to Install Door Trim.
Here is the essential tool and hardware list you will need to assemble before starting work:
- Tools: Miter saw (or hand miter box), 18-gauge brad nailer (or finish hammer), pneumatic air compressor, 4-foot bubble level, tape measure, combination square, utility knife, manual nail set punch, oscillating multi-tool.
- Materials: Jamb material (flat jamb stock or 1/4-inch sanded finish plywood), casing moldings, wood shims, 1-1/2 inch and 2-inch brad nails, construction adhesive, wood filler, paintable caulk, fine-grit sandpaper (180/220 grit), high-quality trim paint.
Step-by-Step Guide: How to Install Door Casing on a Doorless Opening
Trimming a doorless cased opening requires a methodical workflow to ensure flush joints, parallel lines, and tight mitered corners. Follow these step-by-step instructions based on proven finish carpentry methods featured in How to Case a Door Opening.
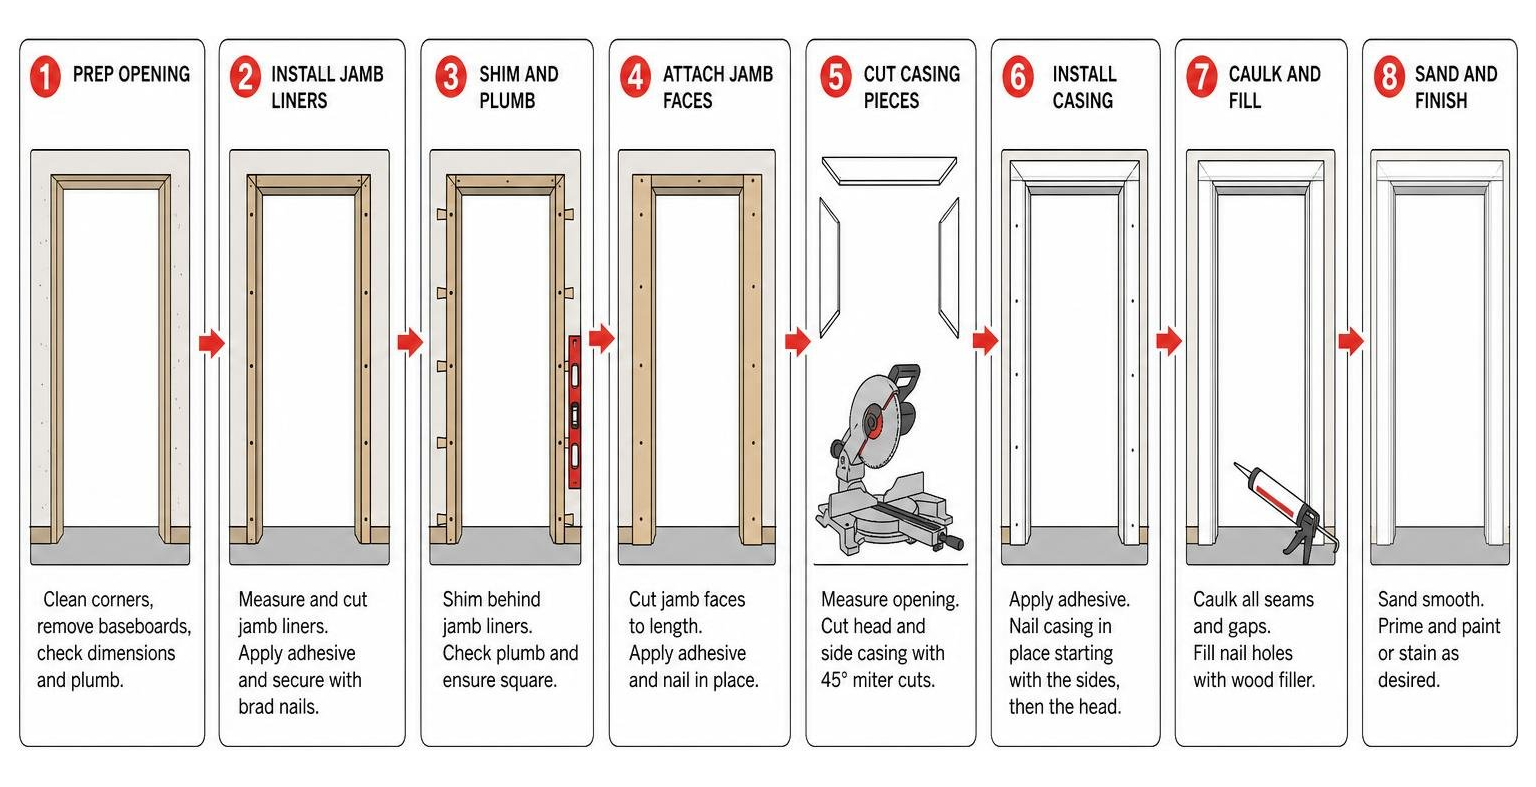
Step 1: Prep the Rough Opening and Install the Door Jamb
- Clean up drywall and corner beads: If you are casing a passageway that was previously drywalled, inspect the outer corners. Standard metal corner beads often have built-up joint compound that creates a thick ridge. Scrape away excess mud with a stiff putty knife so your casing trim can lay completely flat against the wall.
- Remove existing baseboards: Score the caulked top edge of your baseboards on both sides of the doorway using a utility knife. Use a pry bar to gently pull back the baseboards, then trim them cleanly with an oscillating multi-tool to make room for your new casing trim.
- Check opening dimensions and plumb: Measure the opening width at the top, middle, and bottom, as well as the height on both sides. Hold a 4-foot level against the interior sides of the rough opening to identify out-of-plumb studs.
- Prepare and preassemble the jamb: Rip your flat jamb stock down on a table saw so its width matches the wall depth exactly. Cut the horizontal top header jamb first, then the two vertical side jambs. You can either fasten the jamb pieces together on the floor using finish nails and wood glue before lifting the assembly into the opening, or install them piece by piece.
- Shim and fasten the jamb: Insert wooden shims behind the jamb at screw and nail points to compensate for out-of-plumb studs. Use a level to ensure the jamb legs are vertical and square to each other. Secure the jamb into the wall framing using 2-inch brad nails or trim head screws through the shims, then trim off excess shim ends flush with the drywall using a utility knife.
Step 2: Measure, Cut, and Fasten the Door Casing
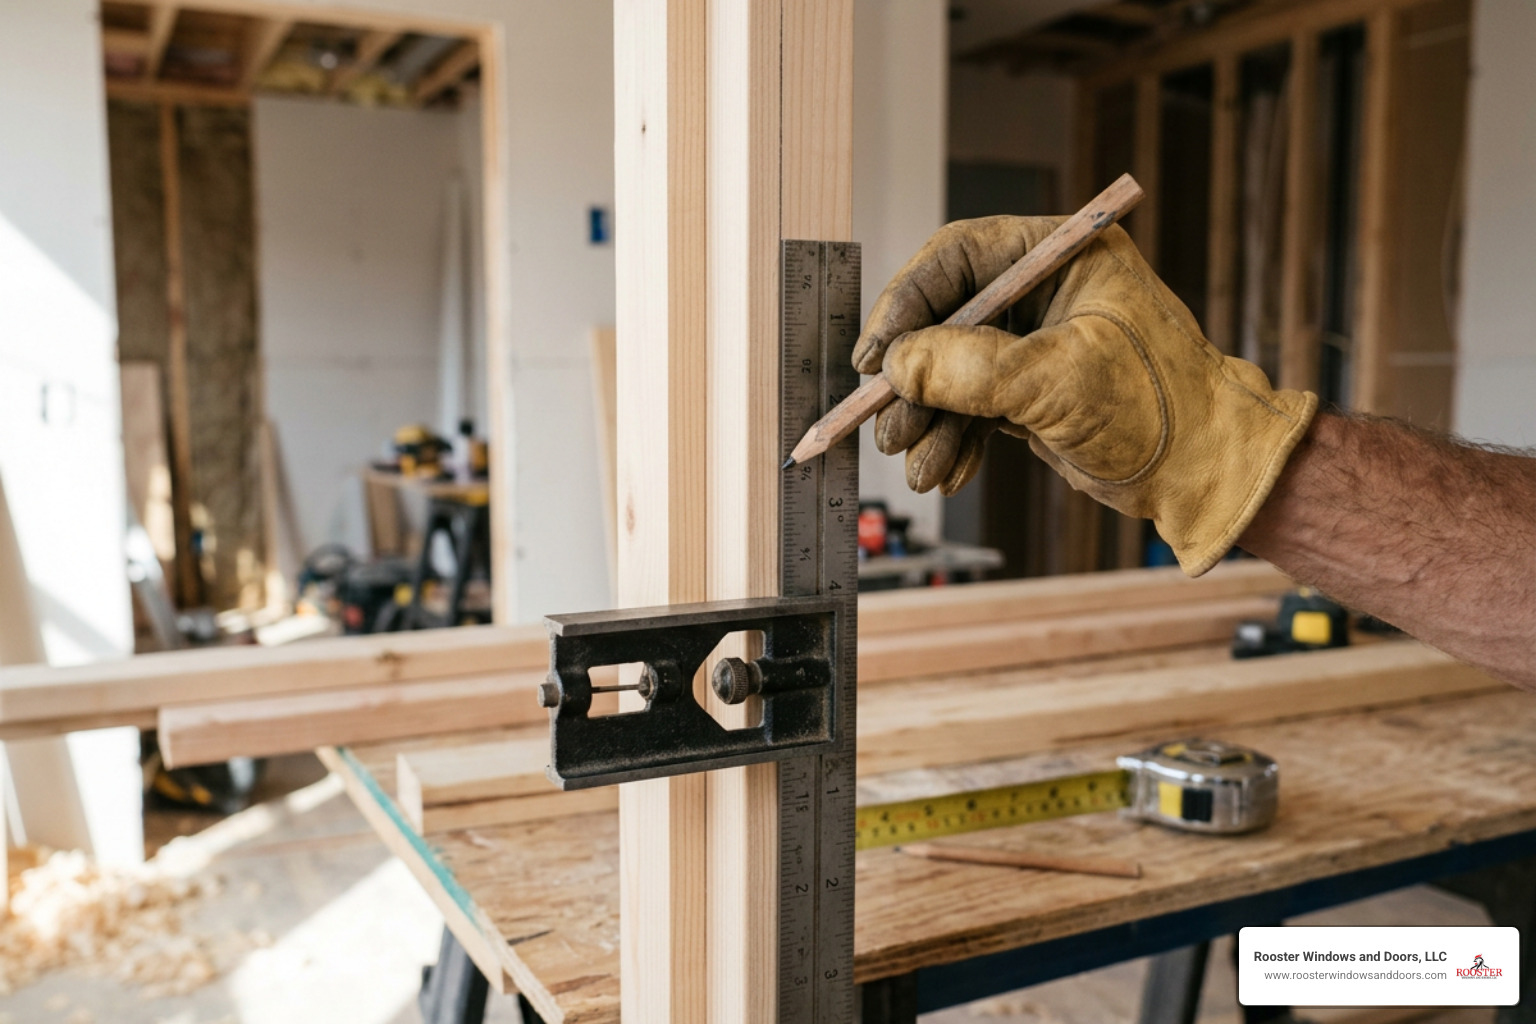
- Mark a consistent reveal: Use a combination square set to 1/4 inch (or 1/8 inch for narrower profiles) and draw a light pencil mark around the inner front edge of the wooden jamb. This line represents your “reveal”—the small recessed ledge between the jamb edge and the edge of the casing. Leaving a reveal creates an attractive shadow line and hides subtle imperfections in the wood.
- Measure and cut side casings: Measure from the floor up to the top horizontal reveal mark on both the left and right sides. Place your casing stock on your miter saw and cut a 45-degree angle at the top end of each side piece. Remember: the short side of your 45-degree miter angle aligns with your reveal mark!
- Attach vertical casings: Align the inner edge of the cut side casing along your pencil reveal line. Fire 1-1/2 inch brad nails into the jamb every 12 to 16 inches, and 2-inch brad nails into the outer edge of the casing to anchor it directly into the wall framing studs behind the drywall.
- Measure and cut the top header casing: Measure the distance between the long points of your installed side casings. Cut 45-degree miter angles on both ends of your top header casing piece. Test fit the header piece to ensure both top miter corners join tightly without gaps.
- Secure miter joints: Apply a small dab of wood glue to the mitered cuts. Position the header trim along the top reveal mark and nail it into the framing. Drive a 1-1/2 inch brad nail downward through the top edge of the corner miter to pin the two casing pieces tightly together.
Step 3: Fill, Caulk, and Paint for a Professional Finish
- Sink nail heads: Inspect all brad nails. If any nail heads sit above the wood surface, use a manual nail punch tool and hammer to sink them 1/16-inch below the wood surface.
- Fill nail holes: Apply wood filler or spackle over every nail hole with a putty knife, leaving a slight crown above the hole to account for shrinkage as it dries. Once completely dry, sand the filled spots smooth using 220-grit sandpaper.
- Caulk all seams: Run a continuous bead of paintable acrylic latex caulk along the seam where the casing meets the drywall, as well as along the interior reveal seam where the casing meets the wooden jamb. Smooth the caulk bead with a damp finger or sponge to create a seamless transition.
- Apply finish paint: Once the caulk has skimmed over (typically 30 to 60 minutes), apply a high-quality semi-gloss or satin interior trim paint. Paint in the direction of the wood grain for a smooth, brush-mark-free finish.
Troubleshooting Complex Openings: Uneven Walls and Proportional Design
While casing a brand-new, perfectly level drywall opening is straightforward, working in older homes or addressing modern builder shortcuts can present unique finish carpentry challenges.
Handling Out-of-Plumb Walls and Asymmetrical Clearances
In historic residences across Evanston, Oak Park, or Chicago, wall studs may lean outward or twist over time. If a wall is 3/4-inch out of plumb across a doorway height, attaching casing flush against the drywall will make the opening look visibly twisted.
To correct out-of-plumb openings, build up custom scrap wood shims behind your jamb liner until your framing level reads completely plumb. If the wall drywall bulges out past the jamb edge, gently tap the drywall edge with a hammer to compress the plaster/drywall core, or use a hand block plane to taper the back edge of your casing trim so it lays flat.
Another common dilemma occurs in tight hallways where a cased opening sits right next to a perpendicular wall, closet, or kitchen cabinet. In these tight spaces, standard 3.5-inch casing trim might fit on one side of the opening, but prove too wide for the opposite side. Finish carpenters often make the mistake of simply ripping (narrowing) one piece of casing, leaving an asymmetrical, mismatched doorway.
As detailed in industry carpentry techniques like Cased Opening Secrets, the secret to maintaining full-width casing on both sides is adjusting the opening framing. By removing a strip of drywall on the tight side and adding narrow 2x blocking built flush with wall studs, you can shift the opening jamb slightly. This allows full-width trim to fit symmetrically on both sides for a balanced profile.
Adjusting Opening Heights for Better Proportions
In modern open-concept floor plans, builder-grade pass-through openings are sometimes cut abnormally tall or wide compared to nearby 80-inch interior door frames. When an uncased pass-through is taller than surrounding doors, adding wide trim headers can make the ceiling look cluttered.
You can easily adjust a cased opening’s proportions by constructing a simple 2×4 drop-down support header box inside the upper rough opening before installing your jamb. Lowering the header height so the top of your new casing trim aligns horizontally with neighboring door frames creates visual harmony across the entire room. If you are updating trim throughout a historic property, see our guide on Replacing Interior Doors in Old House.
Frequently Asked Questions About Casing Doorways
Is a door jamb required for a cased opening with no door?
Yes, installing a flat wooden jamb liner is highly recommended for a cased opening with no door. The jamb covers exposed wall framing, conceals raw drywall edges, and compensates for uneven wall depths. Without a jamb, face casing trim will sit unevenly against raw drywall, leading to visible gaps, fragile corners, and an unfinished appearance.
Should doorway casing be installed flush or with a reveal?
Doorway casing should virtually always be installed with a consistent 1/8-inch to 1/4-inch reveal back from the inner edge of the jamb. Setting casing completely flush with the jamb edge creates an unstable seam that easily cracks over time as wood expands and contracts. A reveal creates a crisp shadow line, improves visual depth, and makes applying paintable caulk fast and clean.
Can I use pre-cut door casing kits on a doorless opening?
Yes! Pre-cut interior door casing kits designed for standard 80-inch door openings work exceptionally well for doorless cased openings. Because standard openings share the same height and width specifications as standard door frames, pre-mitered casing kits allow you to finish an opening rapidly with minimal miter saw cutting. For a walkthrough on using pre-packaged casing kits, refer to How to Install Interior Door Casing.
Conclusion: Achieving a Seamless Cased Opening
Transforming a bare drywall pass-through into a cased opening is one of the most rewarding DIY finish carpentry projects you can undertake. By installing a smooth jamb liner, setting casing with a uniform reveal, and meticulously filling, caulking, and painting every joint, you elevate a builder-grade opening into a permanent architectural feature that protects your walls and unifies your home’s design.
Whether you are updating a single living room pass-through or embarking on a whole-home interior trim upgrade across the greater Chicagoland area, precision craftsmanship makes all the difference. If your home improvement plans expand to full frame updates, custom doors, or window replacements, our experienced team at Rooster Windows and Doors, LLC is here to bring high-quality craftsmanship to your home. Explore our complete range of services at Professional Door Services to get started today!

