

Why the Best Way to Hang Interior Doors Matters More Than You Think
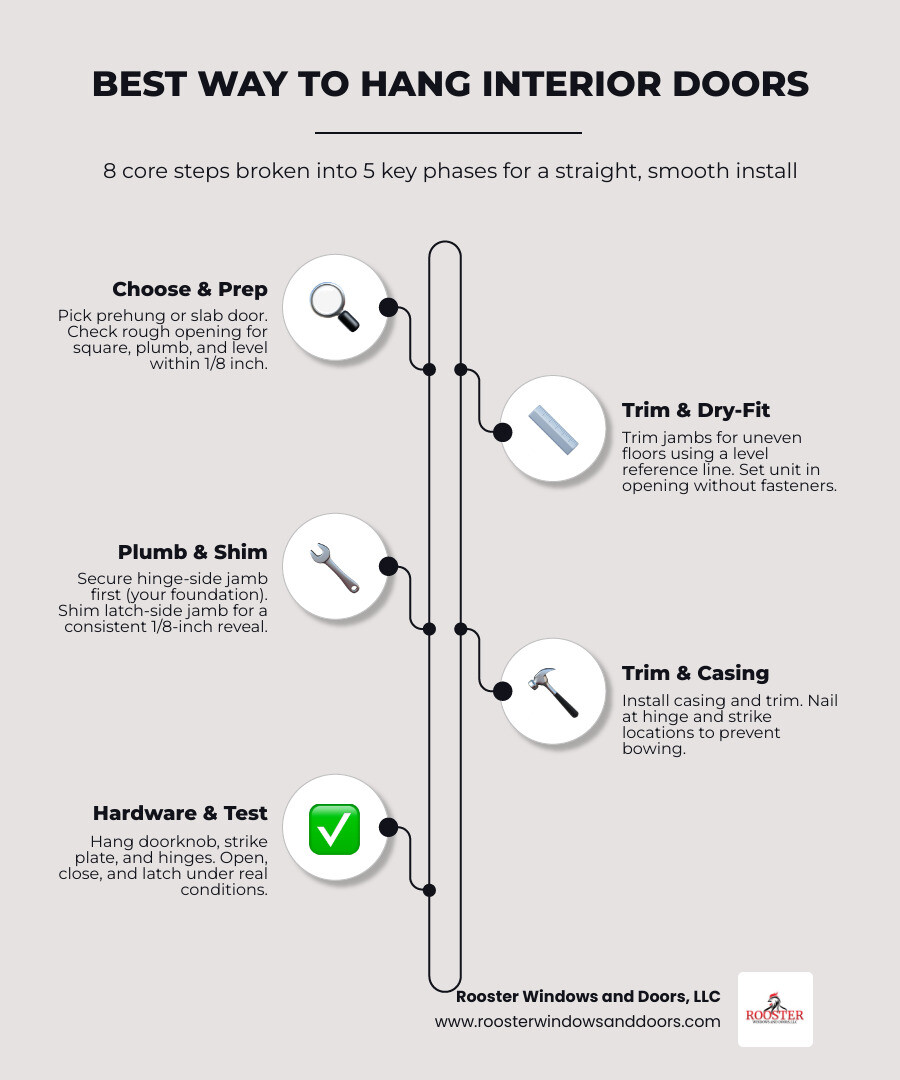
The best way to hang interior doors comes down to eight core steps:
- Choose your door type — prehung (door + frame together) or slab (door only)
- Prep the rough opening — check that it’s square, plumb, and level within 1/8 inch
- Trim the jambs — account for uneven floors using a level reference line
- Dry-fit the unit — set it in the opening before committing to any fasteners
- Plumb and secure the hinge-side jamb first — this is your foundation
- Shim and secure the latch-side jamb — aim for a consistent 1/8-inch gap (reveal) all around
- Install the casing and trim — nail at hinge and strike locations to prevent bowing
- Hang hardware and test — open, close, and latch the door under real conditions before calling it done
A door that looks great but swings open on its own, rubs the frame, or won’t latch properly is one of the most frustrating things in a home. It’s a problem that comes up constantly in older houses — floors out of level, rough openings slightly out of square, and frames that have shifted over decades of settling.
The good news: a careful, methodical install fixes all of it. Whether you’re replacing a damaged frame with a prehung unit or fitting a new slab into an existing jamb, the process is learnable and the results are genuinely satisfying.
This guide walks you through every step — tools, measurements, shimming, trim, and troubleshooting — so your door hangs straight, swings smoothly, and stays put.
I’m Piotr Wilk, and at Rooster Windows and Doors, LLC, I’ve spent over two decades installing doors across the Chicagoland area — so I know from real-world experience that the best way to hang interior doors is all about precision in the prep work, not speed. Everything in this guide reflects what actually works in the field, from new construction to century-old homes with floors that haven’t been level since the Eisenhower administration.
Prehung vs. Slab: Choosing the Best Way to Hang Interior Doors
When you are planning on replacing interior doors, your first big decision is choosing between a prehung door and a slab door. Many DIYers assume that a slab door is easier because it is “just the door,” but the reality is often the exact opposite.
Let’s break down how these two options compare to help you decide which path is right for your home.
| Feature | Prehung Door | Slab Door (Blank Door) |
|---|---|---|
| What’s Included | Door slab, hinges, and the jamb/frame fully assembled. | The door slab only. No frame, no hinges, no pre-bored lockset holes. |
| Ideal For | Damaged frames, new walls, or complete room remodels. | Existing door frames that are perfectly plumb, square, and reusable. |
| DIY Difficulty | Moderate (mostly leveling, shimming, and securing). | High (requires precise trimming, mortising hinges, and boring holes). |
| Time Commitment | ~1.5 hours for a beginner; 45 minutes for a pro. | 2 to 3+ hours (requiring meticulous carpentry work). |
| Structural Forgiveness | High (allows you to correct out-of-plumb rough openings). | Low (if your existing frame is warped, the slab will bind). |
For a complete breakdown of the physical and financial differences between these two options, check out the How to Replace an Interior Door: Prehung Door Replacement (DIY) | Family Handyman guide.
When to Choose a Prehung Door
We almost always recommend a prehung door if your existing door frame is damaged, warped, or completely out of square. If you are doing a home addition or building new walls in your basement, a prehung door is the industry standard.
When you choose a prehung unit, you are essentially buying a self-contained system. The hinges are already mortised, the door is perfectly aligned to the jamb, and the latch hole is pre-bored. If you are replacing interior door frame components anyway, going prehung saves you hours of tedious chiseling and guarantees that the door will fit its frame with factory-level precision.
When to Choose a Slab Door
A slab door (often called a blank door) is the right choice if your existing wood frame is in pristine, structurally sound condition. This is highly common when replacing interior doors in old house settings where the original heavy timber frames are beautiful, historic, and too structurally integrated to easily remove without destroying plaster walls.
Choosing a slab is highly cost-effective because you aren’t paying for a new frame or new trim. However, it requires a high level of patience. You will need to carefully trim the new wood to fit the existing opening, copy the hinge locations from the old door, and mortise the hinges yourself.
Essential Tools, Materials, and Rough Opening Preparation
Before you make your first cut or drive your first screw, you need to gather your gear. Having the right tools on hand is what separates a professional, stress-free installation from a frustrating weekend of repeated trips to the hardware store.
Here is what we keep in our work trucks for every interior door job:
- Tape measure and pencil
- 4-foot level (critical for checking plumb and level)
- Wooden cedar shims (tapered shims are essential for adjusting the frame)
- Finish nails (8d for securing the jambs, 4d for the trim)
- Construction screws (3-inch screws to anchor the hinges into the wall studs)
- Hammer and nail set (or a cordless finish nailer)
- Power drill with a 1/8-inch drill bit
- Circular saw or hand saw (for trimming jambs)
- Safety glasses and hearing protection
Preparing the Rough Opening: The Best Way to Hang Interior Doors Straight
The secret to a flawless door installation actually has very little to do with the door itself. It is all about the rough opening. If the rough opening is a disaster, your installation will be too.
First, let’s look at the numbers. The rough opening should be 2 to 2.5 inches wider than the door slab itself to allow room for the jambs and shims. For example, if you are installing a standard 30-inch door, your rough opening should be at least 32 to 32.5 inches wide. Additionally, the rough opening should be 1/2 inch wider and 1/2 inch higher than the outside dimensions of the prehung jamb assembly.
Before setting your door, check these three critical tolerances:
- Squareness: Measure the rough opening diagonally from corner to corner in an “X” shape. The maximum allowable deviation from square is 1/4 inch. If the diagonal measurements differ by more than that, you will need to adjust your shimming strategy to compensate.
- Plumb and Level: Use your 4-foot level to check the trimmer studs (sides) for vertical plumb and the header (top) for level. The maximum allowable deviation here is 1/8 inch. If your framing is further out of plumb than this, you may need to perform some minor door frame repair or shave back the framing studs before proceeding.
- Wall Flushness: Ensure the drywall is flush with the framing studs. If the drywall protrudes, the door casing will not sit flat against the wall.
For more technical details on pre-installation tolerances, you can review the official INSTALLATION INSTRUCTIONS FOR INTERIOR PREHUNG DOORS manual.
Trimming Jambs for Uneven Floors
One of the most common mistakes DIYers make is measuring from the floor up to determine if their door frame is level. In the real world—especially in older Chicagoland homes in historic areas like Evanston or Barrington—floors are rarely level. If you rest your door jambs directly on an uneven floor, your entire door frame will sit crooked, causing the door to bind or swing on its own.
To prevent transferring a sloped floor to your door, follow this pro technique:
- Find a Level Reference Line: Place your 4-foot level horizontally across the rough opening on the drywall, about a foot off the floor. Mark a perfectly level line across the opening, extending it onto both sides of the drywall.
- Measure Down: Measure from your level reference line down to the floor on both the left (hinge) side and the right (strike) side.
- Calculate the Slope: If the hinge side measures 14 inches and the strike side measures 14-3/8 inches, your floor slopes by 3/8 of an inch.
- Trim the Jambs: Transfer these exact measurements to the bottom of your prehung door jambs, measuring down from a corresponding reference point. Cut the bottom of the longer jamb with a circular saw. This ensures that when the jambs rest on the floor, the top header remains perfectly level.
- Account for Flooring: If you are installing the door over subfloor but plan to install thick carpet or tile later, elevate the jambs slightly. Standard interior doors should clear the finished floor by 1/2 inch to allow for proper airflow and smooth operation.
Step-by-Step Guide to Installing a Prehung Door
Now that your rough opening is prepped and your jambs are trimmed to match your floor, it is time to hang the door.
Before you begin, we highly recommend reading our interior door replacement complete guide to familiarize yourself with the full scope of the project. If you are ready to jump into the physical steps, you can also cross-reference this process with the How to Install a Pre-Hung Interior Door (DIY in 8 Steps) tutorial.
Plumbing and Securing the Hinge-Side Jamb
The hinge-side jamb is the absolute foundation of your entire installation. If this side is not perfectly plumb, gravity will take over, and your door will behave like it is haunted—either swinging open or closed on its own.
- Dry-Fit the Unit: Carefully lift the prehung door assembly into the rough opening. Keep the temporary shipping plug or strap intact so the door slab doesn’t swing open wildly while you are trying to align the frame.
- Use Temporary Blocks: A fantastic carpentry trick is to temporarily nail scrap blocks of wood to the outside of the door jambs, letting them overlap the drywall. This holds the jamb perfectly flush with the drywall while you work on shimming.
- Shim Behind the Hinges: Insert cedar shims in pairs from opposite sides of the wall directly behind the top, middle, and bottom hinges. Tapered shims must be driven from opposite directions so they create a flat, parallel support block that won’t twist the jamb.
- Plumb the Hinge Jamb: Place your 4-foot level against the inside of the hinge jamb. Adjust the shims until the bubble is dead-center.
- Secure the Hinge Side: Pre-drill through the jamb and shims, then drive 8d finish nails (or finish screws) to temporarily hold it.
- The Top Hinge Anchor Trick: To prevent the door from sagging over time—especially critical if you are installing a heavy solid core door—remove one of the short factory screws from the top hinge leaf. Replace it with a 3-inch construction screw driven directly through the jamb and shims, deep into the framing studs. This anchors the weight of the door to the house framing rather than just the thin jamb.
Shimming the Latch-Side Jamb and Setting the Reveal
Once the hinge side is locked in place, you can focus on the latch side. The key word here is “reveal”—the uniform gap between the door slab and the jamb.
- Remove the Shipping Clip: Carefully open the door to remove the shipping clip or strap.
- Establish the Reveal: Close the door and inspect the gap along the top and the latch side. You are aiming for a consistent 1/8-inch reveal.
- Shim the Latch Side: Place pairs of shims on the latch-side jamb: one near the top, one near the bottom, and one directly behind the strike plate. Adjust these shims until the gap between the door and the jamb is identical all the way around.
- Lock It in Place: Once the reveal is perfect, secure the latch-side jamb by driving finish nails through the jamb and shims into the studs.
- Secure the Strike Plate: Just like we did with the hinges, pre-drill and drive a longer construction screw behind the strike plate. This prevents the latch-side jamb from shifting if the door is slammed shut.
- Trim the Shims: Use a sharp utility knife to score the protruding cedar shims flush with the drywall, then snap them off.
Installing Trim, Casing, and Hardware
With the door frame structurally secured, you can move on to the aesthetic finishing touches.
- Install the Casing: Measure and cut your trim molding. Use a miter saw to cut 45-degree angles for the top corners. We recommend maintaining a consistent 3/16-inch reveal of the door jamb face when nailing your trim. For detailed step-by-step instructions on casing styles and techniques, explore our door trim installation complete guide.
- Fasten the Trim: Nail the casing to both the door jamb and the wall studs using 4d finish nails. If you are curious about the financial side of this step, you can review our guide on the cost to install door trim.
- Install the Hardware: Mount your doorknob and latch assembly. Standard interior door hardware typically has a 2-3/8 inch or 2-3/4 inch backset. Ensure the latch tongue faces the correct direction so it retracts smoothly when the door closes.
- Fill and Caulk: Use wood putty to fill all nail holes in the jamb and casing. Run a neat bead of paintable acrylic caulk along the seam where the trim meets the drywall to hide any minor framing gaps.
How to Install a Slab Door from Scratch
If you have decided that keeping your existing, historic frame is the best route, you will be installing a slab door. This process requires a higher level of precision because you are performing the carpentry cuts that are normally done in a factory.
Before you begin, make sure to read the manufacturer guidelines, such as the A EXISTING FRAME manual, to ensure you don’t void your warranty. If you are upgrading your home’s thermal or acoustic properties, you might also want to learn how to replace hollow core door with solid slabs.
Mortising and Hinge Placement: The Best Way to Hang Interior Doors as Slabs
The absolute easiest way to prep a new slab door is to use your old door as a physical template.
- Trim to Size: Lay the old door directly on top of the new slab door. Align the top and hinge edges. If the new slab is slightly too large, mark the excess wood. Use a hand planer or track saw to shave down the edges. Remember: never trim more than 1/8 inch off any single side to preserve the door’s structural integrity.
- Bevel the Edge: Use a hand planer to put a slight 2-to-3-degree bevel on the leading (latch) edge of the door. This bevel allows the door to swing freely into the frame without catching on the corner of the jamb.
- Mark Hinge Locations: With the old door still aligned on top of the new one, use a sharp utility knife to score the exact top and bottom positions of the existing hinges onto the edge of the new door.
- Chisel the Mortises: Use a wood chisel and a hammer to carve out the hinge “gains” (the recesses where the hinge leaves sit).
- Score the outline of the hinge with your utility knife first to prevent the wood from splitting.
- Make a series of shallow relief cuts across the mortise area with your chisel.
- Chisel out the waste wood, working from the side.
- The mortise depth must allow the hinge leaf to sit perfectly flush with the wood edge. If the hinge sits too deep, the door will bind; if it sits too proud, the door will rub.
Boring the Latch and Hanging the Slab
Once your hinges are mortised, you need to prepare the door for its handle and latch.
- Bore the Holes: Use a standard door lock installation jig and a hole saw. Mark your backset (usually 2-3/8 inches) and drill the main 2-1/8 inch hole for the knob. Next, use a spade bit to drill the 1-inch latch hole through the edge of the door into the main cylinder.
- Mortise the Latch Plate: Just like you did with the hinges, chisel a shallow recess on the edge of the door so the latch plate sits flush.
- Attach the Hinges: Screw the hinge leaves securely to the door slab.
- Hang the Door: With the help of a friend, lift the door slab up to the existing frame. Align the hinge knuckles and slip the hinge pins into place, starting from the top hinge and working your way down. Test the swing immediately to check for any rubbing.
Troubleshooting Common Interior Door Installation Issues
Even if you follow every step perfectly, wood is a natural, living material that reacts to temperature and humidity—especially with the dramatic seasonal swings we experience here in Chicagoland.
Here is how to solve the most common post-installation issues like a seasoned carpenter.
Fixing a Door That Swings Open or Closed on Its Own
If your door won’t stay put, it is out of plumb. Gravity is pulling the heavy door slab toward the lowest point.
- The Hinge Pin Bend Trick: If the door only drifts slightly, you can create a tiny bit of friction to hold it in place. Tap out the middle hinge pin using a hammer and a nail set. Place the pin on a concrete floor and tap the center of it lightly with your hammer to put an almost invisible bend in it. Reinsert the pin. The slight bend creates enough friction to stop the door from drifting.
- The Long Screw Adjustment: If the door drifts heavily, remove the middle screw from the top hinge on the jamb side. Replace it with a 3-inch construction screw. Tightening this screw will pull the top of the door frame closer to the wall framing, leveling out the swing.
Resolving Rubbing, Binding, and Latching Problems
- The Top Corner Rubs: If the top corner of your door rubs against the head jamb, the door is sagging. You can easily fix this by tightening the long screw in your top hinge to draw the door back into alignment.
- The Latch Doesn’t Align: If the door swings beautifully but won’t click into the latch plate, look closely at where the latch tongue is hitting. If it is hitting too high or too low, you can use a small metal file to enlarge the opening of the strike plate. If it is off by more than 1/8 inch, unscrew the strike plate, fill the screw holes with wooden toothpicks and wood glue, shift the plate to the correct position, and re-screw it.
- The Door Springs Back Open: If the door bounces open when you try to close it, the hinges are likely mortised too deep (known as being “hinge-bound”). Unscrew the hinge from the jamb and place a thin piece of cardboard (like a cereal box) behind the hinge leaf to act as a shim, then screw it back in.
Frequently Asked Questions about Hanging Doors
How many hinges do I need for an interior door?
The number of hinges you need depends entirely on the weight and height of the door:
- Hollow core doors (standard height of 6 feet 8 inches) only require 2 hinges.
- Solid core doors (standard height of 6 feet 8 inches) are significantly heavier and require 3 hinges to prevent the frame from warping.
- Any door 84 inches in height or greater (7 feet or taller) requires at least 4 hinges to support the vertical span and prevent bowing.
What is the standard gap or reveal around an interior door?
The industry standard for a clean, professional look is a 1/8-inch reveal along the top and both sides of the door slab. A classic carpenter’s trick is to use a common nickel as a gap spacer while shimming—it is exactly the right thickness! For the bottom of the door, a clearance gap of 1/2 inch above the finished floor is standard to allow the door to swing over rugs and facilitate HVAC airflow.
Can I hang an interior door by myself?
You can absolutely install a prehung door by yourself if you take your time, use temporary alignment blocks, and support the door with shims. However, having a second pair of hands makes the process significantly easier, safer, and faster—especially if you are working with heavy solid-core doors.
Conclusion
Hanging an interior door is one of the most rewarding home improvement projects you can tackle. When you get the prep work right, use the proper tools, and take your time adjusting the shims, you end up with a door that operates flawlessly and elevates the entire look of your home.
However, we also know that not everyone has the time, tools, or patience to spend their weekends wrestling with out-of-plumb rough openings and wood chisels. That is where we come in.
At Rooster Windows and Doors, LLC, we provide high-quality, flawless, and energy-efficient door installations tailored to your home’s unique style. Whether you live in Libertyville, Lake Forest, Highland Park, Vernon Hills, or right in the heart of Chicago, our expert team is ready to handle the hard work for you.
Ready to upgrade your home with beautiful, professionally installed doors? Explore our professional door replacement services and get in touch with us today!

