

Transform Your Home: The Ultimate Guide to Window Basement Install
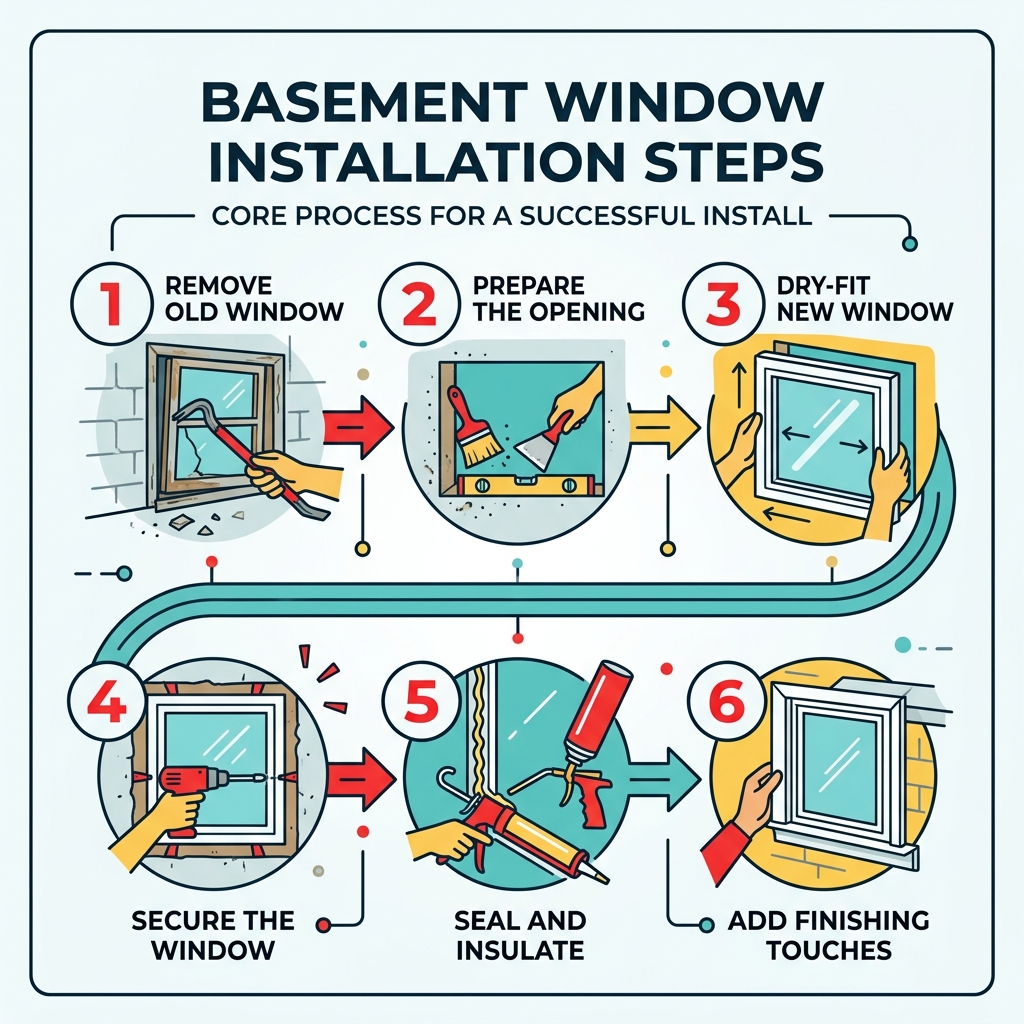
A window basement install is a project that can truly change your home. Replacing old, inefficient basement windows with new, energy-efficient ones offers many benefits. You’ll enjoy more natural light, better ventilation, and improved comfort. A new window can also boost your home’s value and safety, especially when considering egress windows. If you’re ready to upgrade your basement, here are the core steps involved in a successful window basement install:
- Remove the old window: Carefully take out the existing unit, often needing to cut through old caulk, paint, and sometimes the frame itself.
- Prepare the opening: Clean, level, and square the space. Ensure the opening is free of debris and any damaged wood or masonry is repaired.
- Dry-fit the new window: Place the new window into the prepared opening to check for proper size and alignment before permanent installation.
- Secure the window: Use shims to properly position the window, then fasten it securely to the rough opening with appropriate screws or anchors.
- Seal and insulate: Apply waterproof sealant around the exterior perimeter and low-expansion spray foam in the gaps to prevent drafts and water leaks.
- Add finishing touches: Install interior and exterior trim, caulk seams, and ensure proper flashing to complete the look and protect against the elements.
At Rooster Windows and Doors, LLC, our team has two decades of experience in residential window and door installation across Chicagoland. We specialize in precise, quality window basement install projects that meet your home’s unique needs.
Window basement install vocab to learn:
Planning and Preparation for Your Window Basement Install
When we talk about a window basement install, we aren’t just talking about filling a hole in the wall. We’re talking about reclaiming a space that often feels like a dungeon and turning it into a vibrant part of your home. Proper planning is the difference between a window that leaks and one that lasts for decades.
The first step is deciding what you want to achieve. Are you looking for simple ventilation, or are you converting the basement into a legal bedroom? In Illinois, especially in areas like Naperville or Arlington Heights, building codes are very specific about what constitutes a legal living space. Adding an egress window is often a requirement for safety, providing a vital emergency exit while flooding the room with natural light.
Energy efficiency is another huge factor. Old steel-framed windows act like thermal bridges, sucking the heat right out of your basement in the winter. Modern vinyl units with Low-E glass reflect heat back into the house during our brutal Chicago winters and keep the sun’s rays out during the humid summers.
| Window Type | Best For | Pros | Cons |
|---|---|---|---|
| Hopper | Small openings | Great for ventilation; opens inward from top | Can be hard to clean from inside |
| Slider | Wide openings | Easy operation; space-saving | Requires more horizontal space |
| Egress | Bedrooms/Living space | Life-saving exit; maximum light | Requires excavation and window well |
Measuring for Your Window Basement Install
Accuracy is everything. If you order a window that is too large, you’re looking at a nightmare of concrete chipping. If it’s too small, you’ll have massive gaps that even the best foam can’t fix properly.
To get it right, measure the rough opening (the actual hole in the concrete or wood frame) in three different places for both width and height: top, middle, and bottom. Always use the smallest of these three measurements. We recommend subtracting about 1/2 inch from both the width and height to allow for a 1/4-inch gap all the way around. This “wiggle room” is essential for leveling the window and allowing for the expansion and contraction of vinyl frames.
For a deeper dive into sizing, check out our guide on basement window dimensions.
Essential Tools for a Window Basement Install
Don’t start this project on a Sunday afternoon if you don’t have these tools ready. A window basement install in a concrete foundation requires more than just a screwdriver.
- Hammer Drill & Masonry Bits: Essential for boring into concrete or block.
- Reciprocating Saw (Sawzall): Used for cutting through old wood frames or stubborn metal components.
- Angle Grinder: If you have old steel-framed “cast-in-place” windows, you’ll need this to cut the frame.
- Level & Tape Measure: Precision is key to a square install.
- Caulk Gun: For applying high-quality exterior sealant.
- Shims: We prefer PVC or rot-resistant shims over wood for basement environments.
- Safety Gear: Work gloves, safety glasses, and a dust mask are non-negotiable.
Mastering Your Window Basement Install: A Step-by-Step Guide
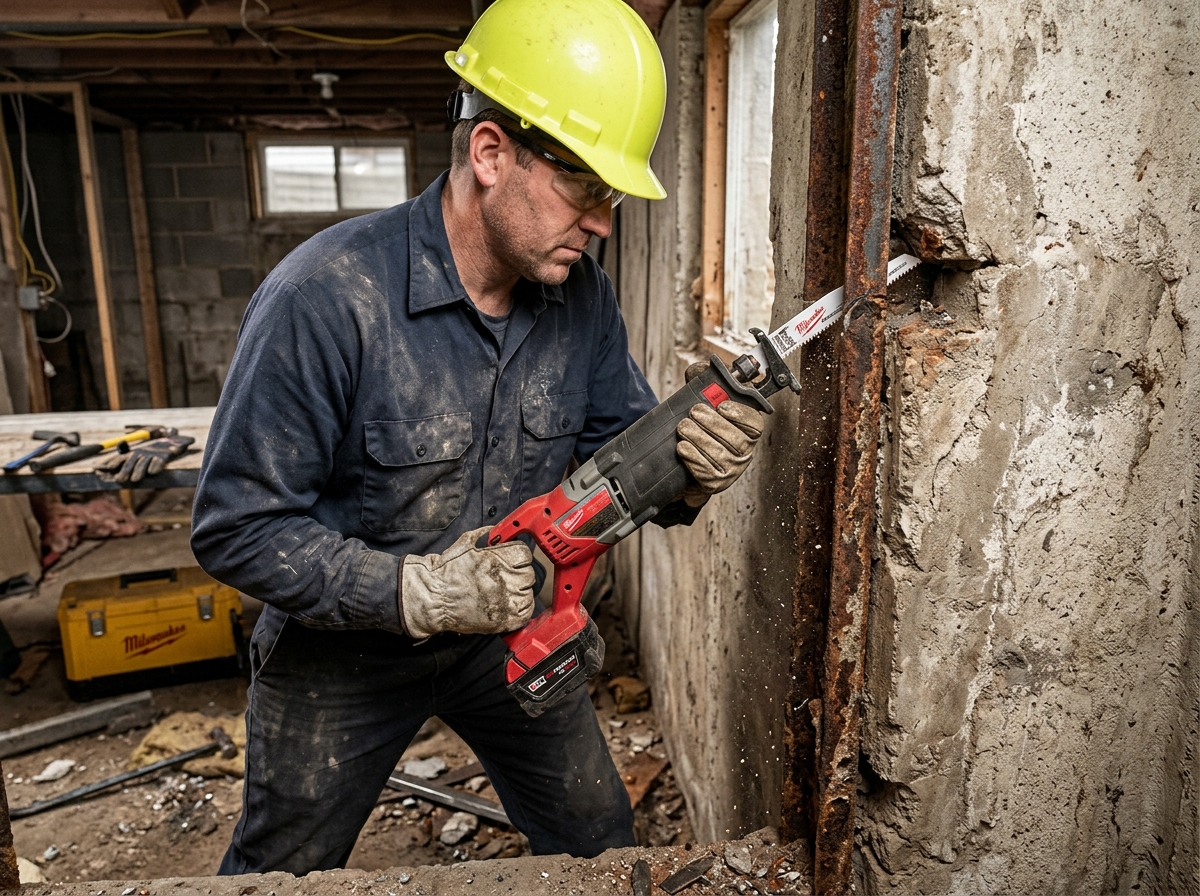
Now we get to the “sweat and swear” portion of the program. Removing the old window is often the hardest part of a window basement install. If you have old steel windows common in 1950s Chicago homes, they might be rusted into the concrete.
Start by removing the glass sashes. If they are stuck, you may need to pry them out or carefully break the glass (wear your safety gear!). Once the sashes are out, use your reciprocating saw or angle grinder to cut through the frame. For steel frames, cutting through the bottom sill usually releases the tension, allowing you to pry the sides away from the masonry.
Once the old unit is out, you must clean the opening. Use a whisk broom or a vacuum to get rid of all dust, old caulk, and loose mortar. If the concrete is uneven, use a hammer and cold chisel to knock off any high spots.
For a visual walkthrough of this process, This Old House offers an excellent guide on the removal phase.
Preparing the Opening and Setting the Frame
With a clean opening, it’s time to prep for the new arrival. We always recommend coating the bare concrete with a siloxane masonry sealer. This prevents moisture from wicking through the foundation and into your new window frame.
In many cases, we install a “buck” frame made of pressure-treated lumber. This provides a square, level surface to attach the window to. A pro tip we use at Rooster Windows and Doors is to rip the bottom sill of this buck at a 5-degree slope. This ensures any water that hits the sill drains away from your home, not into your basement.
Before you apply any glue or screws, do a “dry-fit.” Slide the window into the opening to make sure it fits with enough room for shims. If it’s too snug, you can sometimes use a block plane to shave down the vinyl frame or a chisel to take a bit more off the concrete.
Learn more about the nuances of how to install new basement windows in our detailed blog post.
Securing and Shimming the Unit
Once you’re happy with the dry-fit, it’s time to make it permanent. Place the window in the opening and use shims to center it. You want the window to be “Plumb, Level, and Square.”
- Plumb: Straight up and down.
- Level: Straight across.
- Square: Check the diagonals. If the distance from the top-left corner to the bottom-right corner is the same as the top-right to bottom-left (within 1/16th of an inch), you’re golden.
Fasten the window using masonry anchors or Tapcon screws. Be careful not to overtighten—overtightening can bow the vinyl frame, which will make the window difficult to open and close. Always place your shims at the screw locations to provide a solid backing.
Sealing and Insulating for Maximum Performance
This is where the magic happens for your energy bills. A window basement install is only as good as its seal. Once the window is screwed in, fill the gap between the window frame and the rough opening with low-expansion spray foam.
Warning: Only use “Window and Door” foam. Standard high-expansion foam can exert enough pressure to actually bow the window frame as it cures, ruining your hard work.
Once the foam has dried, trim off the excess with a utility knife. This creates an airtight barrier that stops drafts and keeps those pesky Illinois spiders outside where they belong.
For more tips on keeping your basement dry, check out our guide on waterproofing and sealing basement windows.
Weatherproofing the Exterior
On the outside of the house, you need a secondary defense against water. Apply a generous bead of high-quality butyl or silicone caulk around the top and sides of the window.
Crucial Step: Never seal the bottom exterior edge of the window. Most windows have “weep holes” designed to let moisture escape from the frame. If you caulk the bottom shut, that water gets trapped and will eventually rot your frame or leak into your wall.
If your window is at or below grade, you’ll also need to consider basement window covers to keep leaves and rain out of your window well.
Interior Finishing Touches
Inside, you want the window to look like it’s always been there. We love using PVC trim for basement windows because it’s completely waterproof and won’t rot if there’s condensation. You can also use a drywall return for a modern, clean look.
Once the trim is up, caulk the seams and give everything a fresh coat of paint. This final step turns a construction project into a finished home feature. For more on the final look, see our replacement basement window guide.
Navigating Egress Codes and Safety Requirements
If you are performing a window basement install for a bedroom, you must follow the International Residential Code (IRC) for egress. This isn’t just a suggestion; it’s the law, and it’s designed to save your life in a fire.
Standard egress requirements include:
- Minimum net clear opening: 5.7 square feet.
- Minimum opening height: 24 inches.
- Minimum opening width: 20 inches.
- Maximum sill height: 44 inches from the interior floor.
If your window is more than 44 inches off the floor, you’ll need to install a permanent step or ladder to meet code. In towns like Evanston or Schaumburg, inspectors take these measurements very seriously.
For a full breakdown of the rules, read our egress window installation guide.
Window Well and Drainage Essentials
For windows below ground level, a window well is required. This well must provide at least 9 square feet of “floor area” and extend at least 36 inches from the window.
Drainage is the most overlooked part of a window basement install. You should have a layer of gravel at least 12 inches deep at the bottom of the well. Ideally, this gravel should connect to your home’s perimeter drain tile system. Without proper drainage, your window well becomes a fish tank every time we get a heavy Chicago rainstorm.
If you’re looking for help with the digging, you can find window well companies near me through our network.
Overcoming Installation Challenges
Not every window basement install is straightforward. You might encounter:
- Concrete Cutting: Enlarging a hole in a 10-inch thick poured concrete foundation is heavy work. It requires a specialized diamond-blade saw and a lot of water for cooling.
- Utility Lines: Always call 811 before you dig for a window well. Striking a gas or water line will turn a DIY project into an expensive emergency.
- Uneven Foundations: In older homes, foundations settle. You may need to use extra shims or custom-cut buck frames to get the window level.
If you’re worried about the structural side of things, read more about cutting egress windows.
Frequently Asked Questions about Basement Window Installation
Is a permit required for a basement window install?
In almost all Chicagoland municipalities, yes. If you are cutting into the foundation or changing the size of the opening, you are making a structural change that requires a permit and a subsequent safety inspection. This ensures the work is done to code and won’t affect the stability of your home.
Can I install a basement window in a concrete wall myself?
You can, but it is a labor-intensive project. Simple “swaps” (replacing a window of the same size) are manageable for a confident DIYer. However, if you need to cut concrete for an egress window, the specialized tools and the risk to your foundation often make hiring a pro the smarter choice.
How do I maintain my new basement windows?
Modern vinyl windows are low-maintenance, but not “no-maintenance.”
- Annually: Inspect the exterior caulk for cracks.
- Seasonally: Clean the tracks and ensure the weep holes aren’t clogged with dirt.
- Lubrication: Use a silicone-based spray on moving parts once a year to keep them sliding smoothly.
For a lifetime of performance, refer to our complete basement window guide.
Conclusion
A successful window basement install is one of the best investments you can make in your home’s comfort and safety. Whether you’re doing a simple hopper swap or a full egress conversion, following these steps will ensure a professional result.
At Rooster Windows and Doors, LLC, we take pride in providing the highest quality installations across the Chicago area. From Libertyville to Joliet, we help homeowners achieve energy efficiency and peace of mind with flawless window solutions. If the thought of cutting concrete or navigating egress codes feels overwhelming, we’re here to help.
Ready to transform your basement? Schedule your professional egress window installation with us today and let our experts handle the heavy lifting!

