

Why Installing Bifold Closet Doors in an Existing Frame Is Easier Than You Think
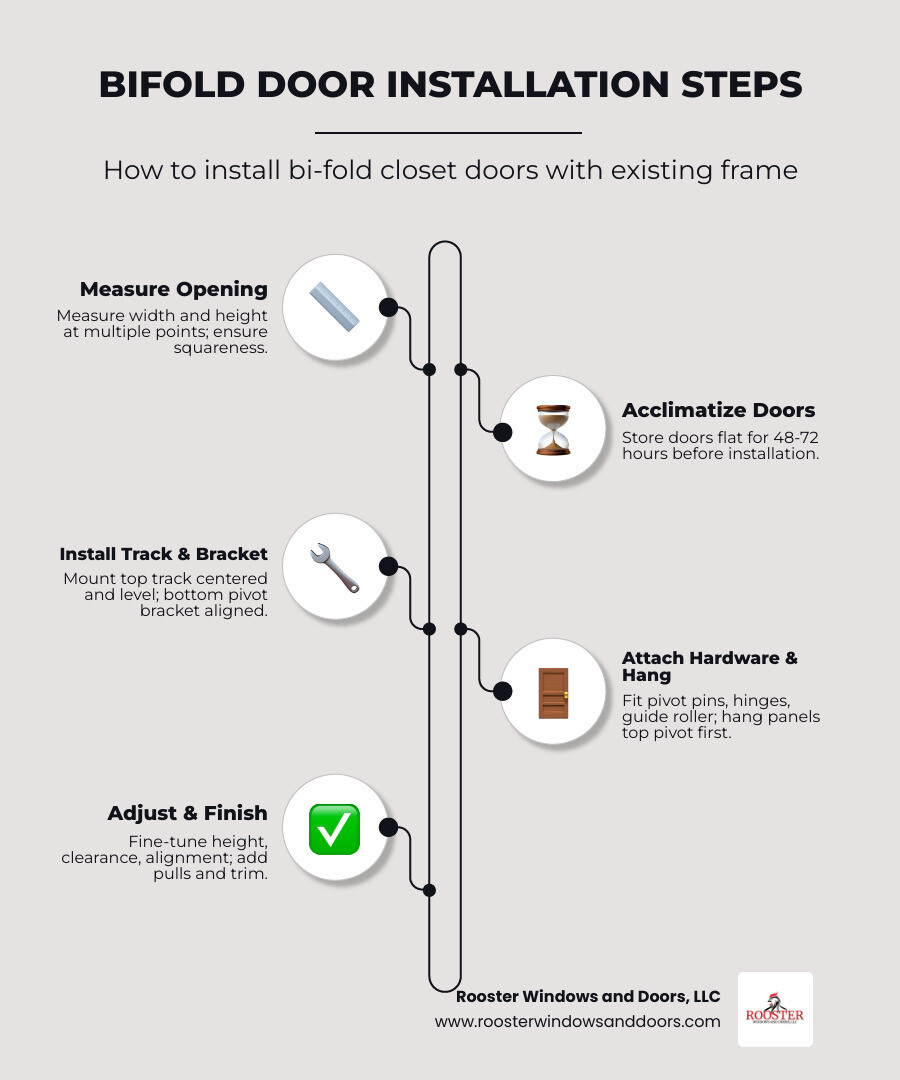
Knowing how to install bi-fold closet doors with an existing frame can save you time, money, and a weekend of frustration. Here is a quick overview of the process:
- Measure the finished opening — width and height — at multiple points
- Acclimatize the new doors for at least 48 hours before hanging
- Install the top track along the header, centered and level
- Mount the bottom pivot bracket directly below the top pivot point
- Attach hardware (pivot pins, hinges, guide roller) to the door panels while flat
- Hang the panels by inserting the top pivot first, then the bottom pivot, then the guide
- Adjust height, side clearance, and alignment until the doors fold smoothly
- Finish with door pulls, aligners, and trim moulding to cover any gaps
Bifold doors are one of the most practical upgrades you can make to a closet, pantry, or laundry area. Unlike a traditional swinging door, a bifold panel folds in on itself when opened — meaning it needs almost no swing radius. That makes it ideal for tight spaces where every inch counts.
The good news? You do not need to tear out your existing frame to make it work. Most standard bifold door kits are designed to drop right into a finished opening — the drywall, jambs, and casing are already in place. The installation is rated as an intermediate DIY project and typically takes 2 to 4 hours to complete.
That said, small mistakes — a track mounted slightly off-center, a pivot bracket that is a fraction of an inch out of alignment — can make a brand-new door feel like it has a grudge against you. This guide walks you through every step so you get it right the first time.
I’m Piotr Wilk, and through more than two decades of residential door installation across Chicagoland’s Lake, Cook, and McHenry Counties with Rooster Windows and Doors, I’ve seen what makes how to install bi-fold closet doors with an existing frame go smoothly — and what trips up even experienced DIYers. Let’s make sure your project lands in the first category.
Preparing and Measuring Your Existing Frame
Before you head to the local home improvement store or place an order online, you must thoroughly inspect the finished opening. A finished opening refers to the visible, framed space inside your doorway where the door will hang, including any pre-installed drywall, wood jambs, or trim.
Older homes in our northern Illinois service areas — from the historic properties in Lake Forest and Highland Park to classic bungalows in Chicago — often experience structural settling over the decades. This settling can cause your door frame to shift out of square, plumb, or level. If your existing frame is severely warped, bowed, or damaged, you may want to read our comprehensive guide on Replacing Interior Doors in Old House to determine if a simple retrofit is viable or if you need to rebuild the frame.
To check your frame’s squareness, place a carpenter’s level against both side jambs to ensure they are plumb (perfectly vertical). Then, place the level against the top header jamb to ensure it is level (perfectly horizontal). Finally, measure diagonally from the top-left corner to the bottom-right corner, and from the top-right corner to the bottom-left corner. If these two diagonal measurements differ by more than a quarter of an inch, your frame is out of square. This does not mean you cannot install bifold doors, but it does mean you will need to rely heavily on micro-adjustments during the final installation steps.
How to Install Bi Fold Closet Doors with Existing Frame: Measuring and Sizing
To ensure your new bifold doors operate without binding or scraping, you must measure the finished opening with absolute precision. Grab a reliable tape measure and record the following dimensions:
- Width: Measure the width of the opening in three places: the top, the middle, and the bottom. Write down all three numbers. If there is a slight variation, use the smallest measurement of the three to determine your door size.
- Height: Measure the height of the opening in three places: the far-left side, the center, and the far-right side. Write down all three numbers. Again, use the smallest measurement to guide your purchase.
Most standard interior bifold doors are designed to fit standard openings that are 80 1/2 inches high. However, bifold doors cannot simply match the exact dimensions of the opening. They require built-in clearances to fold and slide without hitting the frame:
- Width Clearance: Bifold doors typically require a finished opening that is 1/2 inch wider than the nominal door set. This allows for a necessary 1/4-inch clearance gap between the side jamb and the pivot door on both sides.
- Height Clearance: The height specification for a bifold door finished opening is 1-1/2 inches larger than the actual door panels. This extra vertical space is required to accommodate the overhead track, the rollers, and the lower pivot bracket.
If you are retrofitting a non-standard opening, you can find more sizing tips in the How to Install Bifold Doors – Bob Vila guide, which discusses how manufacturers allow only about a 1/4-inch tolerance variation from the specifications listed on the packaging.

Preparing the Existing Frame and Acclimatizing Doors
Once you have purchased your doors, do not rush to hang them immediately. Wood is a natural, porous material that expands and contracts in response to ambient humidity and temperature. In northern Illinois, our seasonal transitions — from humid summers in Arlington Heights to freezing, dry winters in McHenry or Woodstock — can cause rapid wood movement.
To prevent warping, twisting, or bowing, you must acclimatize your bifold doors to your home’s average environment.
- Place the doors in the room where they will be installed for at least 48 hours (or 72 hours if the doors were transported in extreme below-zero winter temperatures).
- Always store the door panels completely flat on a level surface. Never lean them vertically against a wall, as this uneven gravity distribution causes permanent bowing.
- Keep the doors at least 10 feet away from any heating vents, radiators, or temporary construction heaters.
- For a deeper dive into protecting your investment, read our professional guide on How to Keep a Door from Warping.
While the doors are acclimatizing, prepare the existing frame. Remove any old sliding door tracks, hinges, or latches. Use a wood filler to patch old screw holes, sand the surface flat, and apply a fresh coat of paint or stain to the jambs if needed. Doing this work now prevents you from trying to paint around newly installed, clean hardware later.
Step-by-Step Guide: How to Install Bi Fold Closet Doors with Existing Frame
Installing bifold doors is a highly rewarding project. It is classified as an intermediate DIY task, requiring basic hand tools and a steady hand. On average, a homeowner can expect the process to take 2 to 4 hours from start to finish.
Step 1: Gathering Tools and Materials
Before starting, gather all your tools and materials in one place. Nothing slows down a home improvement project quite like searching for a missing drill bit while balanced on a step stool. You will need:
- Tools:
- Tape measure and pencil
- Hacksaw (with a fine-toothed blade to cut the metal track)
- Power drill and driver bits
- Handheld screwdriver (for delicate adjustments)
- Carpenter’s level (at least 24 inches long)
- Plumb bob or laser level
- Hammer or rubber mallet
- Safety glasses and dust mask
- Materials:
- Bifold door kit (including panels, track, pivots, brackets, and guide rollers)
- Upgraded heavy-duty wood screws (we highly recommend substituting the flimsy screws included in budget kits with Simpson Strong-Drive SD8X1.25 wood screws for a rock-solid hold)
- Masking tape (to protect door surfaces during trimming or drilling)
- Wood shims (to correct out-of-level headers)
Safety Note: That drilling, sawing, or sanding wood door panels produces wood dust. Work in a well-ventilated area and wear eye protection and a dust mask. Additionally, if you are working on a home built before 1978 in older areas of Evanston or Chicago, be mindful of potential lead paint on the existing frame and follow proper EPA lead-safe work practices.
Step 2: Installing the Top Track and Bottom Pivot Bracket
The overhead track is the highway of your bifold door system; if it is crooked, your doors will bind.
- Measure and Cut the Track: Measure the width of your header jamb. Cut the metal track to length using a fine-tooth hacksaw. Pro Tip: Cut the track so that it leaves exactly a 1/16-inch gap on either end. This tiny clearance prevents the track from binding against the side jambs during seasonal shifts. Use a file to remove any sharp burrs from the cut edge.
- Mark the Track Position: Draw a centerline along the underside of the top header jamb. Typically, you want to set the track back about 1 inch from the front face of the jamb to allow the doors to sit flush with the trim when closed.
- Mount the Track: Hold the track up to your marked line. Pre-drill pilot holes through the track mounting holes into the header to prevent the wood from splitting. Screw the track securely into place. If the header is slightly bowed, insert thin wood shims between the track and the wood header to keep the metal track perfectly straight. Do not overtighten the screws, as this can warp or distort the aluminum track.
- Install the Bottom Pivot Bracket: The bottom bracket supports the weight of the doors and must align perfectly with the top track. Hang a plumb bob or use a vertical laser level from the center of the top track’s pivot bracket down to the floor. Mark this exact spot on the floor and side jamb. Position the metal bottom pivot bracket on the floor against the side jamb, ensuring it aligns vertically with the top track pivot. Secure it to the floor and jamb using heavy-duty wood screws. For a detailed visual breakdown of track alignment, you can reference How to Install a Bi-Fold Closet Door – HandyManHowTo.
Step 3: Attaching Hardware to the Door Panels
With the track and floor brackets in place, it is time to prep the door panels. Lay the doors completely flat on a pair of padded sawhorses or a clean, carpeted floor to protect the finish.
- Identify the Hardware: Your kit will include a top pivot pin (usually smooth or threaded with a spring), a top guide roller (a plastic wheel or spring-loaded cap), and a bottom pivot pin (usually threaded with an adjustable nut or dial).
- Insert the Pivots: Locate the pre-drilled holes on the top and bottom edges of the door panels. Tap the top pivot pin into the hole on the top edge of the panel closest to the wall jamb. Tap the bottom pivot pin into the corresponding hole on the bottom edge of the same panel. Tap gently with a rubber mallet; this is not the time to force things or risk splitting the wood.
- Insert the Guide Roller: Tap the spring-loaded guide roller into the pre-drilled hole on the top edge of the outer (lead) door panel. This roller will slide along the track to guide the door’s folding motion.
- Attach Hinges: If your door panels are not pre-hinged, align them flat on the floor with their back faces pointing up. Space the hinges evenly according to the manufacturer’s instructions, pre-drill pilot holes, and screw the hinges in place to connect the panels.
Step 4: Hanging the Bifold Door Panels
Hanging the door panels can be tricky to coordinate alone. We strongly recommend having a partner assist you to hold the weight of the doors and prevent scratches to your freshly painted frames.
- Fold the Panels: Fold the two connected door panels together so they form a single tight bundle.
- Insert the Top Pivot: Lift the doors and insert the top pivot pin into the receiving bracket in the overhead track.
- Seat the Bottom Pivot: Lift the doors slightly and guide the bottom pivot pin into the floor jamb bracket. The pin should rest securely in the bracket’s slot or adjusting wheel.
- Engage the Guide Roller: Compress the spring-loaded top guide roller down, slide it under the track, and release it so it snaps securely into the track runner. Ensure the plastic snugger guide (the small plastic bumper inside the track) is positioned between the guide roller and the center of the track to help the doors snap shut and stay closed.
For a clear, step-by-step review of this sequence, you can consult How to Install Bifold Doors in 8 Steps.
Fine-Tuning, Adjustments, and Troubleshooting
Once the doors are hung, you will likely notice they do not close perfectly on the first try. They might rub against the side jamb, drag on the floor, or sit crookedly in the opening. Do not panic — bifold doors are highly sensitive to micro-adjustments, and a few small tweaks will have them operating smoothly.
Adjusting Door Height, Side Clearance, and Alignment
To achieve a professional, gap-free look, you need to adjust both the vertical height and the horizontal alignment of the doors:
- Vertical Adjustment (Height): If the door is rubbing against the floor, carpet, or top header, you need to raise or lower it. Lift the door assembly slightly to relieve pressure, then turn the threaded adjusting dial on the bottom pivot pin. Turning it clockwise raises the door; turning it counterclockwise lowers it. Adjust the height until you have an even gap at both the top and bottom of the door.
- Horizontal Adjustment (Plumb): If the door hits the side jamb or has an uneven gap when closed, you must adjust its lateral position. To do this, loosen the screw in the top track pivot bracket. Slide the bracket left or right until the door panel sits perfectly plumb (vertical) and leaves an even 1/4-inch clearance gap between the door edge and the side jamb. Once aligned, tighten the screw securely. You can make similar horizontal adjustments at the bottom bracket by sliding the pivot pin along the slotted bracket floor plate.
Installing Door Pulls, Knobs, and Aligners
With the doors moving freely, you can install the final hardware accessories:
- Door Knobs/Pulls: A common DIY mistake is installing the door knob on the wrong panel or in an awkward location. For the best leverage and easiest operation, install the door pull in the horizontal center of the middle rail (the solid horizontal wood section) of the lead door panel (the panel that slides, rather than the pivot panel). Pre-drill a hole through the panel, push the bolt through from the back, and tighten the knob on the front face.
- Door Aligners: If you are installing a double set of bifold doors that meet in the middle of a wide closet opening, you will need door aligners. These are metal, tongue-and-groove brackets that screw onto the back (closet side) of the lead door panels, approximately 12 inches from the floor. When the doors are closed, the aligners catch each other, keeping the front faces of the doors perfectly flush with one another.
Adding Trim and Moulding to Hide Gaps
Even a perfectly installed bifold door will have small clearance gaps at the top and sides. If you prefer a clean, built-in look, you can install decorative trim to conceal the overhead track and side gaps.
Purchase PVC or wood quarter round moulding. Measure and miter-cut the pieces to fit the interior perimeter of the door frame. Close the bifold doors completely, hold the moulding in place so it covers the track hardware without touching or binding against the door panels, and fasten it to the door jambs using a brad nailer and 1-1/2 inch brad nails. For detailed tips on choosing and installing trim styles, refer to our Door Trim Installation Complete Guide.
Troubleshooting Common Bifold Door Issues
If your doors are still misbehaving, use this quick reference table to diagnose and resolve the issue:
| Problem | Likely Cause | Solution |
|---|---|---|
| Door rubs or drags on the floor/carpet | Bottom pivot pin is set too low; floor is out of level. | Lift the door and turn the bottom pivot dial clockwise to raise the door panel. |
| Door hits or scrapes the side jamb | Top or bottom pivot bracket is adjusted too close to the wall. | Loosen the bracket screws and slide the pivots away from the jamb to establish a 1/4-inch gap. |
| Doors pop back open or won’t stay closed | Snugger guide in the track is missing or out of position; aligners are loose. | Slide the plastic snugger guide to the center of the track; adjust or tighten the back-mounted door aligners. |
| Door pops out of the track during operation | Top guide roller is not fully seated; track is warped or dirty. | Re-insert the spring-loaded guide roller; clean dust and debris from the track; loosen track screws slightly if warped. |
Frequently Asked Questions about Bifold Door Installation
What should I do if my existing frame is slightly out of square?
If your existing door frame is slightly out of square, you do not necessarily need to tear it down. Bifold door hardware allows for up to 3/8 inch of horizontal adjustment to compensate for minor frame movement. You can use wood shims behind the top track to keep it level, and adjust the top and bottom pivot brackets independently to align the doors plumb with the world, even if the wood jambs are slightly crooked. If the frame is severely out of shape, you may need to install thin wood filler strips (like 1×4 pine) to square up the opening before hanging the doors.
Can I replace a hollow core bifold door with a solid core door?
Yes, you can upgrade from hollow core to solid core doors for improved durability, better sound dampening, and a more premium feel. However, solid core doors are significantly heavier. If you make this upgrade, you must replace standard, budget-grade mounting hardware with heavy-duty pivots and tracks designed to carry the extra weight. Additionally, ensure your top track is anchored directly into solid wood framing (the header) rather than just drywall or thin trim. To weigh your options, check out our guide on how to Replace Hollow Core Door with Solid.
How to install bi fold closet doors with existing frame when the opening is too small?
If your finished opening is slightly too small (by 1/2 inch or less), you can trim standard 1-3/8 inch thick hollow or solid core molded and flush doors to fit.
- Determine how much wood needs to be removed (up to 1/4 inch maximum from each side of the door set to avoid cutting into the door’s structural core).
- Apply a strip of masking tape along your intended cut line on both faces of the door panel; this minimizes wood chipping or splintering.
- Use a fine-toothed circular saw to carefully trim the edge.
- Sand the cut edge smooth, seal it with paint or stain to protect against humidity, and proceed with your hardware installation.
Conclusion
Mastering how to install bi-fold closet doors with an existing frame is an excellent way to refresh your home’s interior, maximize your storage access, and optimize limited floor space. By carefully measuring your finished opening, acclimatizing your door panels, and taking your time with precise pivot adjustments, you can achieve a beautiful, smooth-gliding installation that functions flawlessly for years to come.
Of course, while installing bifold doors is a highly achievable DIY project, it does require precision, patience, and the right tools. If you are dealing with severely out-of-square frames, heavy solid-core doors, or simply want to ensure a perfect, worry-free fit without spending your weekend troubleshooting alignment issues, we are here to help.
At Rooster Windows and Doors, we specialize in providing high-quality, energy-efficient, and flawless door installations tailored to your home’s unique style. We proudly serve homeowners across the northern Chicago suburbs and collar counties, including Libertyville, Lake Forest, Highland Park, Vernon Hills, Grayslake, Mundelein, Lake Zurich, Buffalo Grove, Deerfield, Gurnee, Waukegan, Antioch, Crystal Lake, Algonquin, Cary, McHenry, Woodstock, Huntley, Fox River Grove, Arlington Heights, Palatine, Schaumburg, Evanston, Northbrook, Glenview, Des Plaines, Mount Prospect, Hoffman Estates, Barrington, and Chicago.
Ready to upgrade your home’s interior doors with professional precision? Contact us today to schedule our professional door installation services and let our expert team handle the heavy lifting for you!

