Why Installing Vinyl Sliding Glass Door is Worth Your Time
Installing vinyl sliding glass door can transform your home’s comfort and curb appeal while saving you significant money on labor costs. DIY installation typically saves homeowners $300 to $1,000 in professional installation fees, and the project can be completed in 2-4 hours with intermediate skills.
Quick Installation Overview:
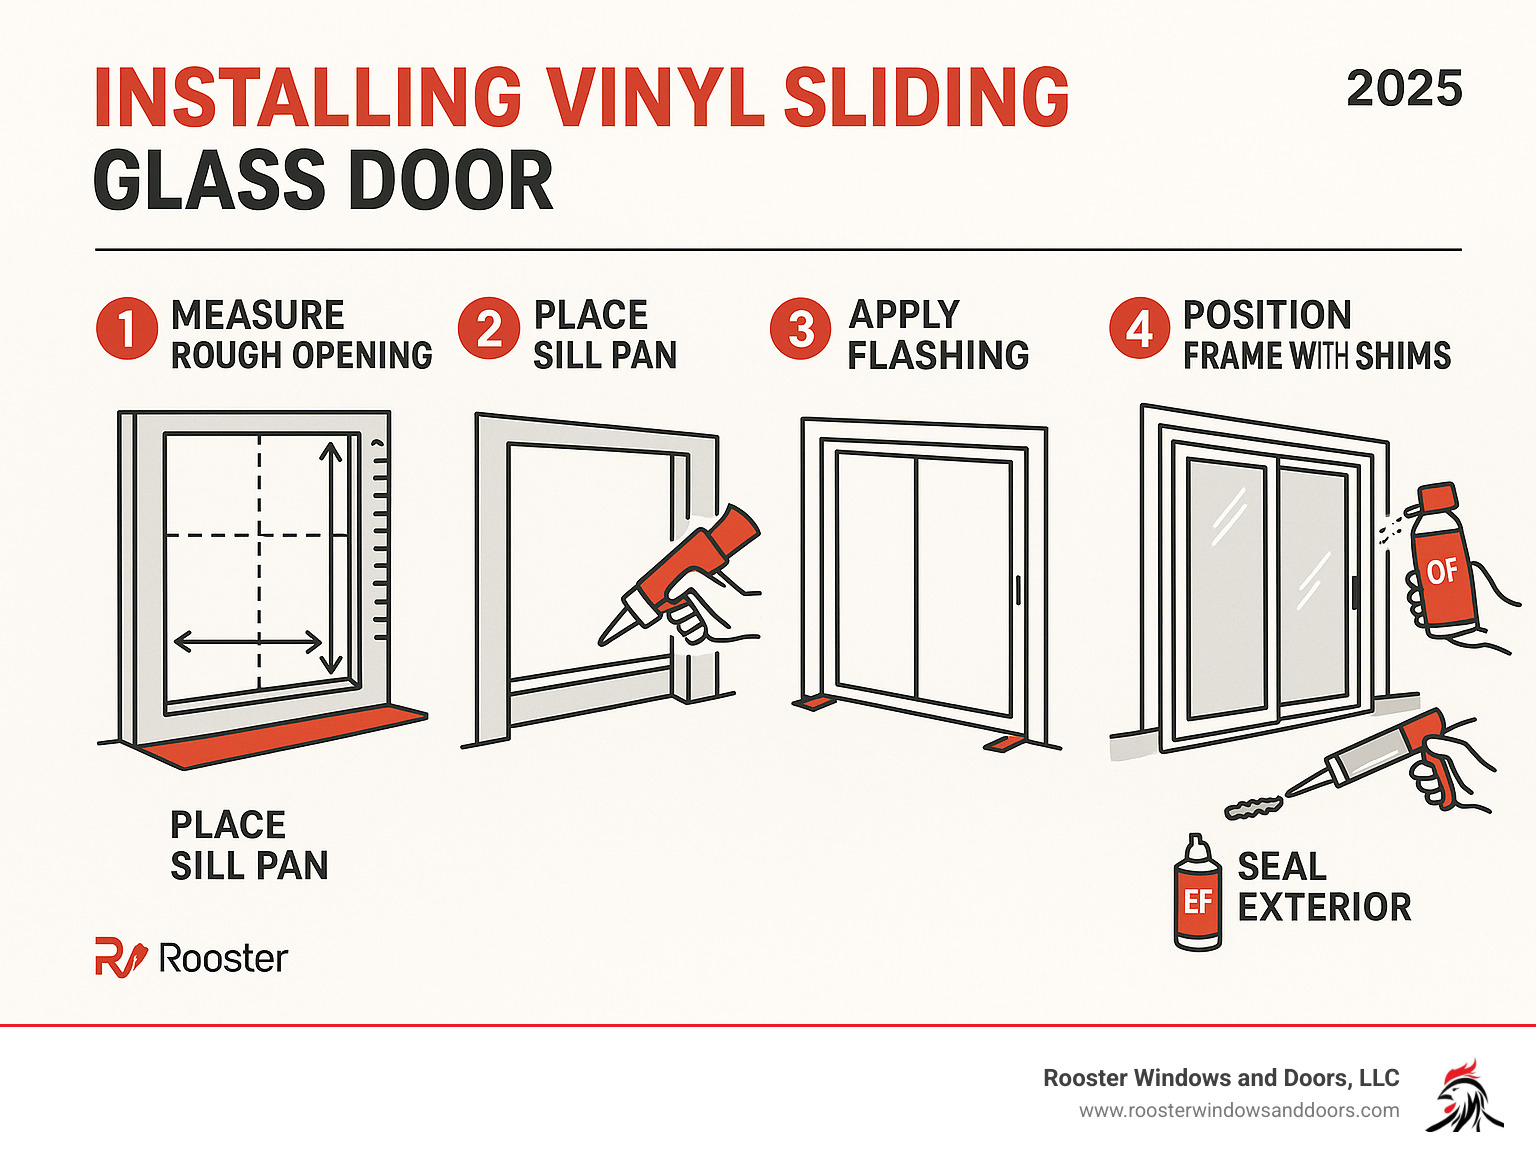
- Measure the rough opening (width, height, diagonal)
- Remove the old door panels and frame
- Prepare the opening with waterproof flashing and sill pan
- Position and secure the new door frame with shims
- Seal gaps with low-expansion foam and exterior caulk
- Adjust rollers and locks for smooth operation
Vinyl sliding doors offer excellent value – they cost about half the price of wood-clad options while providing superior energy efficiency through features like double-pane glass with argon gas fill and low-E coatings. The average homeowner spends around $1,800 for a standard 6-foot vinyl sliding door when professionally installed, making DIY installation an attractive option for budget-conscious homeowners.
Common challenges include ensuring the rough opening is perfectly square (diagonal measurements within 1/8 inch), properly waterproofing the sill to prevent water infiltration, and adjusting the door panels for smooth operation. The key to success lies in precise measurements, proper preparation, and patience during the shimming process.
I’m Piotr Wilk from Rooster Windows and Doors, and over two decades of installing vinyl sliding glass door systems in the Chicagoland area, I’ve seen how proper installation techniques can make the difference between a door that lasts decades and one that causes problems within years. This guide will walk you through each step to achieve professional results.

Simple guide to installing vinyl sliding glass door:
Gearing Up: Essential Prep Work for Your Door Installation
Proper preparation is the foundation for a successful installation. When installing vinyl sliding glass door systems, taking the time to gather tools and measure correctly prevents most common issues.
Your success starts with having the right equipment. You’ll need safety glasses, a reliable tape measure (25 feet or longer), and a level that is at least 4 feet long to ensure your door frame is perfectly plumb. For the installation, gather a power drill with various bits, a caulk gun, and a sturdy pry bar. You’ll also need plenty of shims (cedar or plastic), quality exterior-grade sealant, flashing tape (at least 6 inches wide), and corrosion-resistant screws like #10 x 2-3 inch deck screws.
This is a two-person job. Sliding glass door units weigh between 100-300 pounds, and handling them solo is a recipe for injury or damage. Line up a capable helper before you start.
Measuring the Rough Opening for a Perfect Fit
Accurate measurements are critical for a proper fit and smooth operation. Start by removing the interior trim around your existing door to measure the actual rough opening.
Measure the width at the top, middle, and bottom of the opening. Use the smallest of the three measurements as your working width. Do the same for the height, measuring at the left, center, and right sides.
Your rough opening should be approximately 1/2-inch wider and 3/8 to 1/2-inch taller than the door unit. This space allows for shimming and ensures you can get the frame perfectly square and plumb.
Next, check for square by measuring diagonally from corner to corner in both directions. The two measurements should be within 1/8-inch of each other. If they aren’t, you’ll need to correct the opening before installation. Use your level to verify the sides are plumb and the sill is level, as even minor deviations can cause the door to bind.
More info about Door Installation
Removing Your Old Sliding Glass Door
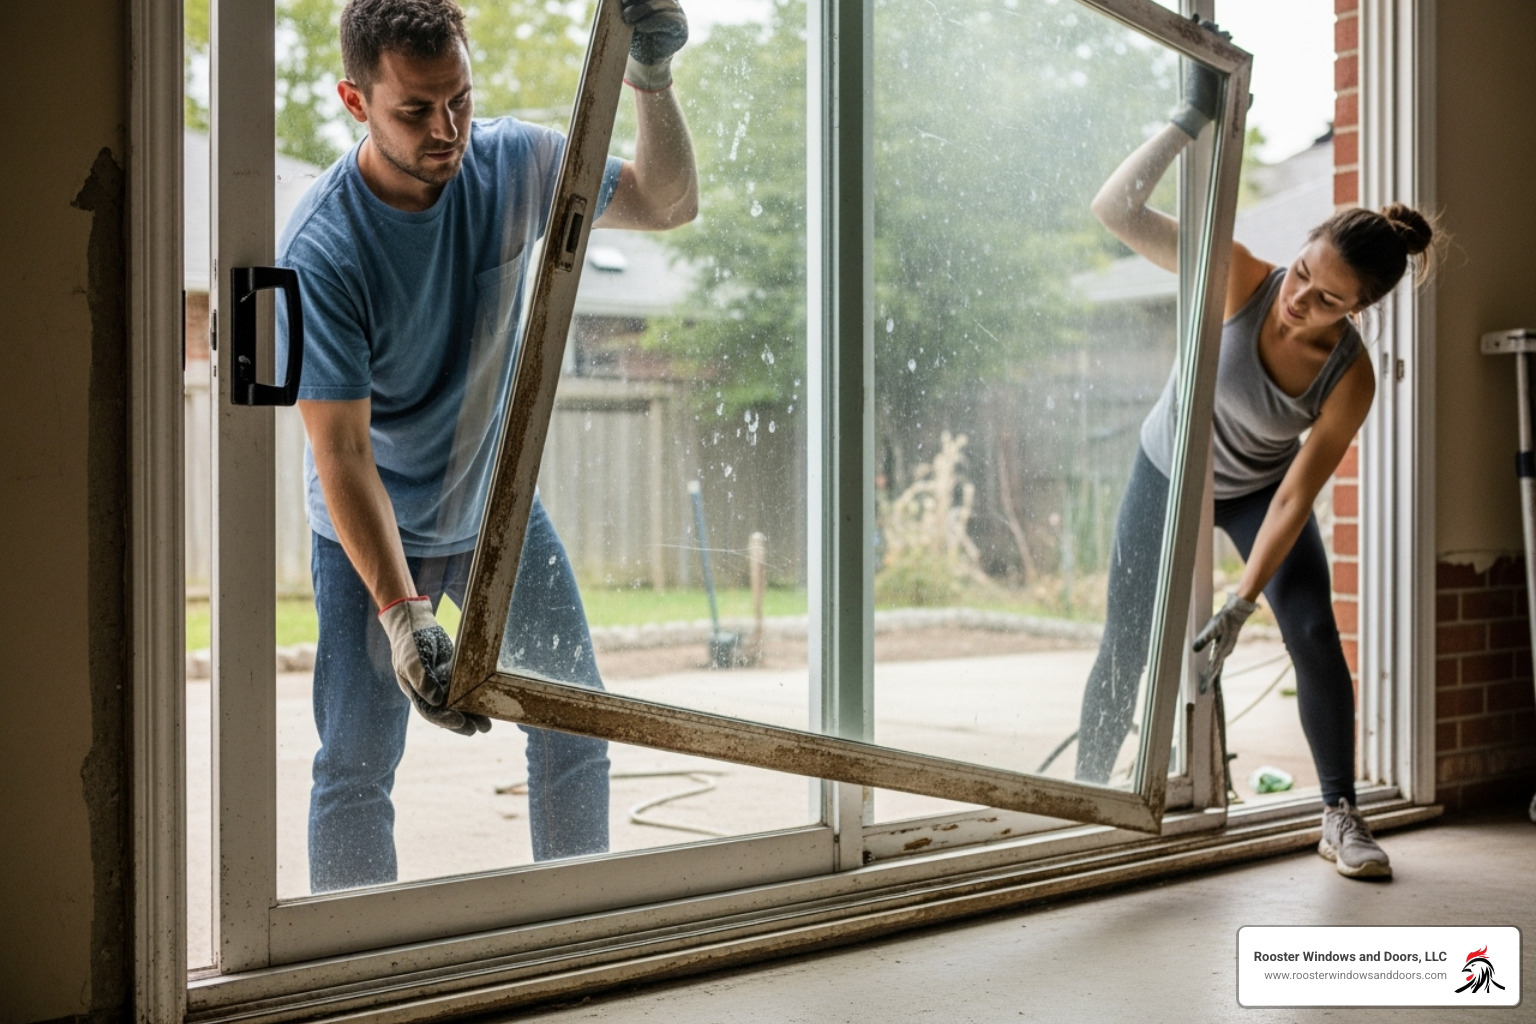
With your helper, you can now remove the old door. Clear the work area inside and out, lay down tarps, and remove any window treatments. For safety, turn off power at the breaker if electrical outlets are nearby.

First, remove the screen door, which typically lifts up and tilts out. Next, tackle the sliding panel. Lower the adjustment screws at the bottom of the panel, then lift the panel up and off the track with your helper. Tilt the bottom out and carry it away.
The fixed panel is removed similarly, but you must first remove any screws securing it to the frame. Once unfastened, lift and tilt it out.
To detach the old frame, find and remove all screws or nails securing it to the rough opening studs. These may be hidden under trim or caulk. Use a pry bar for stubborn frames, and a reciprocating saw to cut old fasteners if necessary, being careful not to damage the surrounding structure.
Finally, clean the opening thoroughly with a shop vacuum to remove all debris. This is your chance to inspect for damage like wood rot or water stains. Address any issues before proceeding with installing vinyl sliding glass door.
The Step-by-Step Process for Installing Vinyl Sliding Glass Door
With the opening prepared, you’re ready for the main event: installing your vinyl sliding glass door. This stage requires patience and precision to create a weather-tight installation that will last for decades. Modern homes can create negative air pressure, which can pull water through even tiny gaps, making proper waterproofing essential.

Preparing the Rough Opening for Installing a Vinyl Sliding Glass Door
Before setting the door, create a robust moisture barrier. Give your sill one final level check; it must be perfectly level and solid. Correct any dips or humps with shims now.
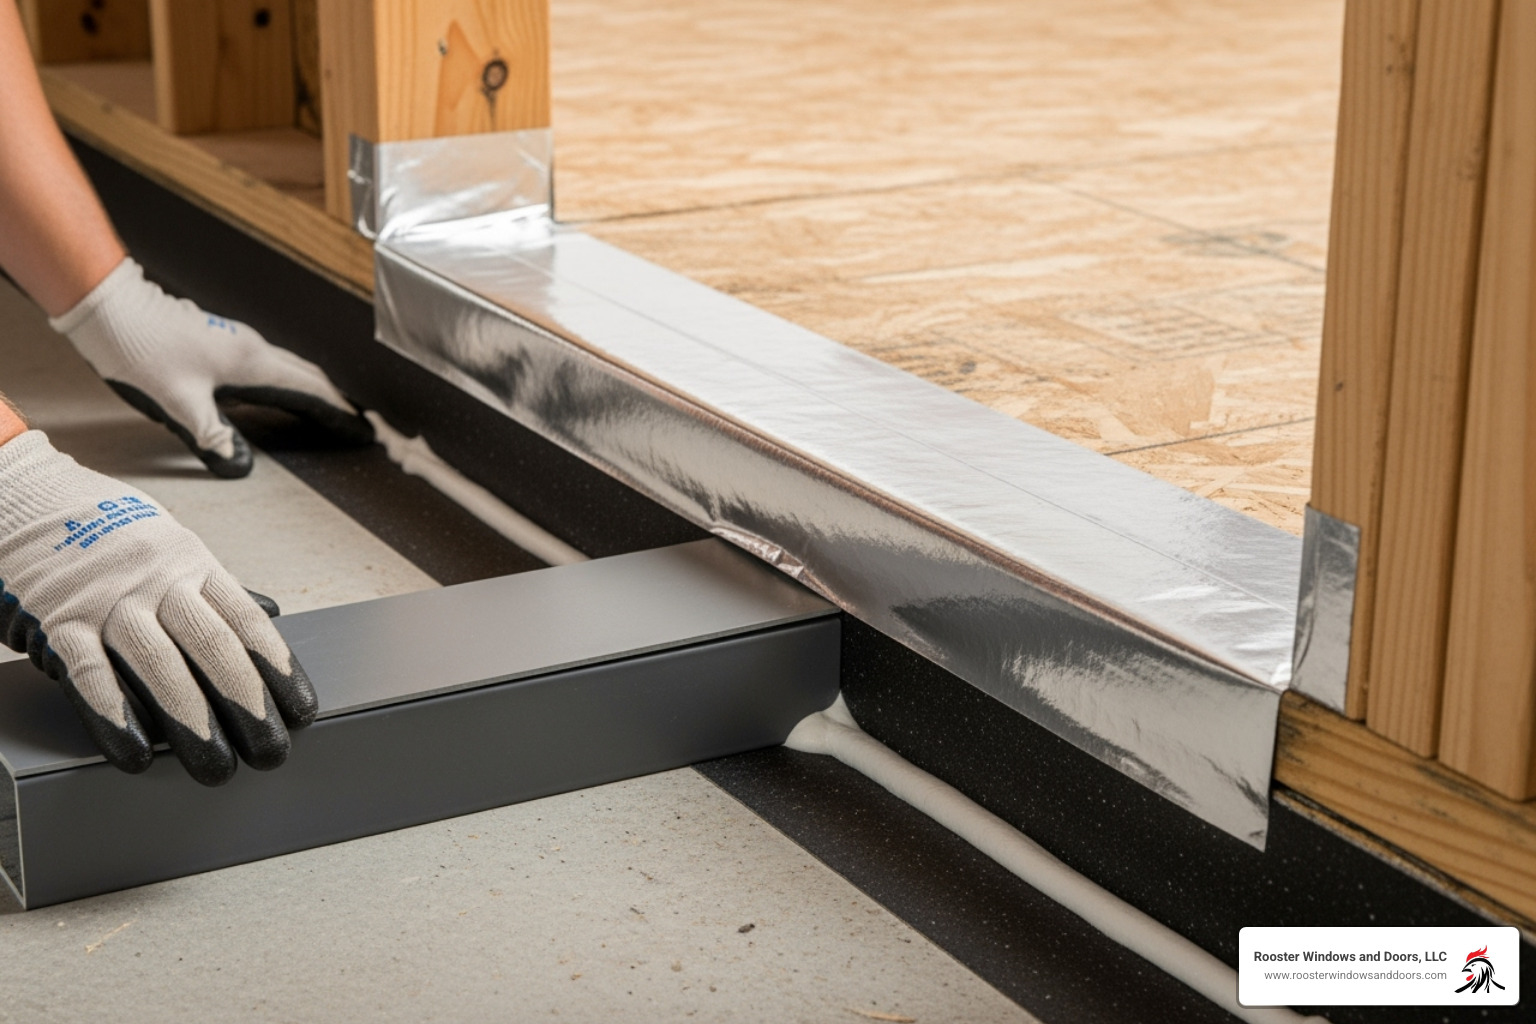
Next, install the sill pan, which collects any water that gets past other defenses and directs it outside. You can use a pre-formed plastic pan or create one from sheet flashing. Apply a continuous bead of high-quality exterior sealant along the subfloor where the pan will sit. Press the pan firmly into the sealant, ensuring it slopes slightly to the exterior. If you have a concrete foundation and metal sill pan, place a barrier like flashing tape between them to prevent corrosion.
Now, apply the flashing tape. This self-adhesive waterproof membrane creates a continuous seal. Start with the sill flashing, applying tape over the sill pan and extending it up each side jamb by at least 6 inches. Use a J-roller to smooth out any wrinkles. Next, apply flashing up each side jamb, overlapping the sill flashing by at least 1 inch. Finally, apply the header flashing across the top, overlapping the side pieces. This shiplap effect ensures water flows outward.
Before positioning the door, apply two or three continuous beads of high-quality silicone caulk along the sill pan where the frame will rest, plus vertical beads up the jambs to create the primary seal.
A visual guide to door installation
Positioning, Shimming, and Securing the Frame
This step requires a balance of strength and finesse. With your partner, carefully lift the door frame assembly from the exterior. Tilt the bottom of the frame into the rough opening first, then guide the rest into place. Press down firmly to seat the frame into the caulk beads on the sill.
Center the frame within the rough opening, leaving roughly equal gaps on the sides and top. Now, begin shimming. Insert pairs of shims (one from each side) between the frame and the rough opening studs at every pre-drilled screw hole. Also place shims at all four corners and about every 12 inches along the head and jambs.
Shims support the frame and prevent it from warping when screws are tightened. Insert them just enough to fill the gap without distorting the frame. Use your level to continuously check that the frame remains perfectly plumb and level. Re-check the diagonal measurements to ensure it stays square (aim for less than 1/8-inch deviation).
Once the frame is perfectly positioned, secure it permanently. Start at the top corners, then the bottom corners, and work along the jambs. Drive corrosion-resistant screws through the pre-drilled holes, through the shims, and into the studs. Countersink each screw until the head is flush, but do not over-tighten, as this can warp the vinyl. After each screw, re-check your plumb, level, and square measurements.
Nailing Fin vs. No-Fin Installation Differences
Most vinyl doors have an integral nailing fin (a flat flange around the perimeter), but some are designed without one for specific applications like masonry openings.
Doors with nailing fins offer a robust attachment method, as the fin is screwed or nailed directly to the exterior sheathing. This also aids waterproofing, as the fin acts as another barrier. The exterior trim typically installs over the fin. This method requires careful flashing tape application over the fin, using the same shiplap method (bottom first, then sides, then top) to direct water away.
Doors without nailing fins are secured directly through the side jambs into the rough opening studs. This method is often used in retrofits where removing exterior cladding isn’t practical. Without a fin, waterproofing relies entirely on your flashing tape, sealant, and sill pan. The seal between the frame and weather barrier must be perfect. This installation may also require more robust exterior trim work to bridge the gap between the door and the wall.
Fin doors are generally easier for new construction or major remodels. No-fin installations can be trickier but are necessary for certain situations. Both methods yield excellent results when done correctly; follow the manufacturer’s instructions for your specific door.
More info about Exterior Door Installation
Finishing Touches: Sealing, Adjusting, and Insulating
Your door frame is secured; now it’s time for the finishing touches. These final steps are what separate a good installing vinyl sliding glass door project from a great one, ensuring flawless performance for years.
Sealing Against Air and Water Leaks
Creating a complete seal involves multiple layers of protection to keep the elements outside.
Start with the interior foam application. From inside, carefully fill the gaps between the new door frame and the rough opening with low-expansion foam insulation. Use only the low-pressure polyurethane type designed for windows and doors, as regular foam can expand too forcefully and warp the vinyl frame. Apply the foam sparingly, as it will expand. Once cured, trim any excess flush with the wall using a utility knife. Now you can install interior trim around the frame for a finished look.
On the exterior, create your final weather barrier. For larger gaps between the door frame and your home’s cladding, insert backer rod to provide a solid base for the sealant. Apply a continuous bead of high-quality, exterior-grade sealant around the entire perimeter where the door frame meets the house. Immediately after applying, tool the caulk bead with a caulk tool or a gloved finger to create a smooth, concave shape that can flex with temperature changes.
Warning: Never seal the small drainage holes (weep holes) at the bottom of the door’s exterior sill. These are essential for allowing any water that enters the track to escape.
Adjusting Rollers and Locks for Smooth Operation
A well-installed door should glide smoothly. If it feels stiff, it needs fine-tuning.
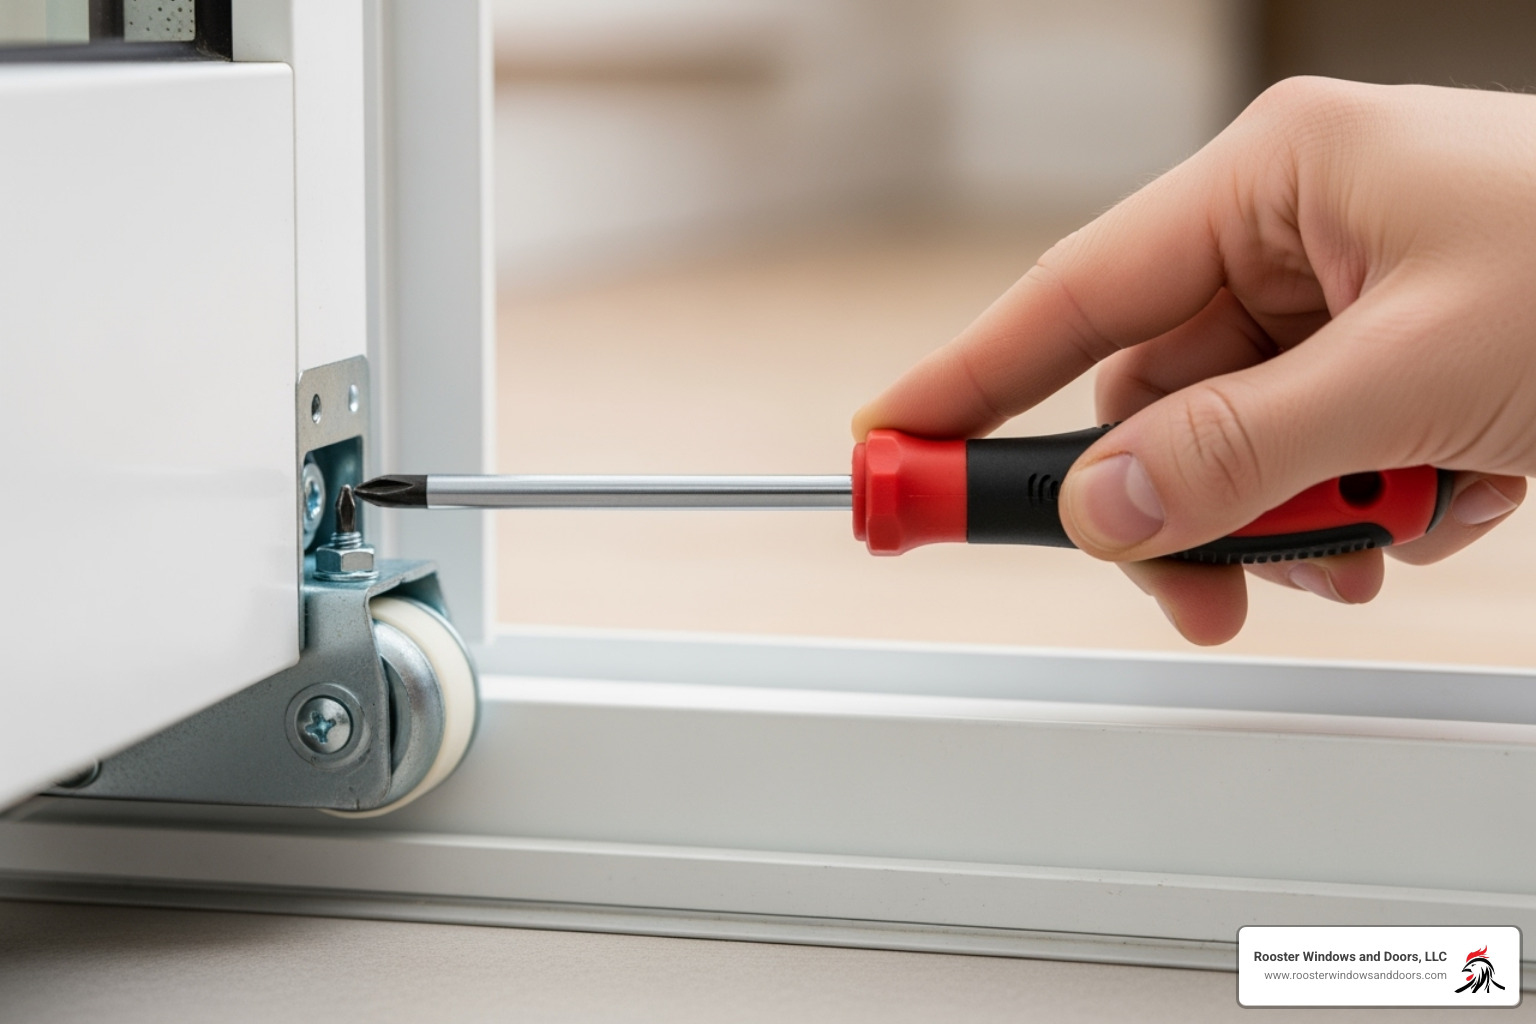
Roller adjustment is key. Locate the adjustment screws on the bottom edge of your sliding panel (usually one on each side). These control the panel’s height. Turn the screws gradually—typically clockwise to raise and counter-clockwise to lower—to find the sweet spot where the door glides smoothly without dragging on the track or binding at the interlocks.

Check for an even reveal—the vertical gap between the sliding panel and the fixed jamb should be consistent from top to bottom.
Next, align the lock and keeper. The door’s lock must mate perfectly with the strike plate (keeper) on the jamb. Close the door and test the lock. If it’s stiff or doesn’t catch properly, adjust the keeper. Loosen its screws, make small positional adjustments, and re-tighten. A properly adjusted lock should engage with a satisfying click and hold the door securely with minimal play. The locking mechanism should feel smooth, with no forcing required for secure handle operation.
Frequently Asked Questions about Vinyl Sliding Door Installation
Let’s tackle the most common questions we hear from homeowners considering installing vinyl sliding glass door systems themselves. After two decades in the business, I’ve seen these same concerns come up time and time again.
How long does it take a DIYer to install a sliding glass door?
For a DIYer with intermediate skills, installing a vinyl sliding glass door typically takes between 2 to 4 hours. This timeframe assumes you’ve done all your prep work, gathered your tools, and have a clear workspace ready to go.
This doesn’t include time for any necessary repairs to the rough opening. If you find wood rot, structural issues, or the opening isn’t square, you’ll need additional time to address these problems first. We always tell our customers to budget extra time – it’s better to work at a comfortable pace than rush and make costly mistakes.
Weather can also play a factor. On a calm, dry day, everything goes smoother. But if it’s windy or threatening rain, you’ll want to work more carefully to protect your home’s interior.
Can I install a sliding glass door by myself?
Here’s where I have to be the voice of reason – this is absolutely a two-person job. Due to the weight and size of the door panels and frame, having a partner is essential for both safety and proper positioning.
These doors can weigh anywhere from 100 to 300 pounds. The glass panels alone are heavy and awkward to handle, and trying to lift and maneuver them solo is asking for trouble. You could seriously injure yourself, damage your new door, or both.
Don’t be a hero here – enlist a friend, family member, or neighbor who’s handy with tools. Your back (and your wallet) will thank you. Plus, having an extra set of eyes helps catch potential issues before they become problems.
What are the most common mistakes to avoid?
After seeing countless installations over the years, I can tell you the most frequent pitfalls that trip up DIYers. Inaccurate measurements top the list – measure twice, cut once definitely applies here. A door that doesn’t fit properly will never perform well, no matter how skilled the installation.
Failing to properly waterproof the sill is another biggie. Water damage can cost thousands to repair, so don’t skimp on the flashing tape and sealant. We’ve seen too many callbacks where water found its way into the home because someone rushed this critical step.
Over-tightening fasteners might seem like you’re being thorough, but it can actually warp the vinyl frame. These frames need to expand and contract with temperature changes, so snug is better than super-tight.
Using the wrong type of sealant or foam insulation can also cause headaches down the road. High-expansion foam might seem like overkill is good, but it can actually bow your frame. Stick with low-expansion foam designed specifically for doors and windows.
We’d also add neglecting to check the rough opening for plumb, level, and square. A crooked opening means a crooked door, no matter how much shimming you do. And always thoroughly clean the rough opening of all debris before installation – old caulk, nails, and dust can compromise your seals and cause problems later.
Take your time with each step, and don’t hesitate to double-check your work. It’s much easier to fix something during installation than after you’ve finished!
Your Gateway to a Brighter Home
Congratulations! You’ve just completed a project that will transform your daily living experience. A properly installed vinyl sliding glass door doesn’t just improve your home’s beauty and value – it creates a seamless connection between your indoor and outdoor spaces while boosting energy efficiency.
Picture this: natural light streaming through your new door, illuminating your morning coffee ritual, or effortlessly stepping onto your deck for evening barbecues. The difference is remarkable, and you did it yourself!
The benefits you’ll enjoy include:
- Increased natural light that makes rooms feel larger and more welcoming
- Improved energy efficiency from modern vinyl frames and low-E glass
- Improved home value with a professional-quality installation
- Better indoor-outdoor flow for entertaining and daily living
- Reduced maintenance compared to wood or aluminum doors
By following this guide step-by-step, you’ve achieved results that rival professional installations. The careful attention to waterproofing, proper shimming, and precise adjustments ensures your door will operate smoothly for decades to come.
However, we understand that not everyone has the time, tools, or confidence to tackle this project. Maybe you finded structural issues in your rough opening, or perhaps you’d simply prefer the peace of mind that comes with professional installation.
That’s where Rooster Windows and Doors comes in. We’ve been providing high-quality, flawless, and energy-efficient installations across the Chicagoland area for over two decades. Our experienced team has the specialized tools and expertise to handle any challenges – from tricky rough openings to complex waterproofing situations.
Whether you’re in Chicago, Aurora, Joliet, Naperville, or any of the surrounding communities, our professionals ensure your new door is installed perfectly the first time. We back every installation with our commitment to quality and customer satisfaction.
Ready to enjoy your beautiful new view without the installation hassle? Contact us for professional Patio Door Installation and step into a brighter, more connected home with complete peace of mind.